In this video, I want to reveal my full process and step-by-step guide on how to upload a video to YouTube in 2023.
How to upload a video to YouTube in 2023?
It’s not trivial and it TAKES time when you want to do it right. Without skipping steps, follow me to my studio.
. Title and Description
The title is a must-have field when uploading a YouTube video.
Typically, YouTubers and content creators would have already researched the title prior to recording their video. With that said, I always try to confirm the title and make sure it’s still optimized for keywords using TubeBuddy during publishing.
Note: You can also use hashtags (as seen in the example below) inside the title. We recommend using 1-3 (max) that are relevant for your video topic.
In addition to title, we highly recommend you enter a description for the video. It helps further communicate the intent of the video to YouTube. It’s also a great place for you to enter any call to action in the form of hyperlinks to direct viewers to your website, social media, eBooks and other resources.
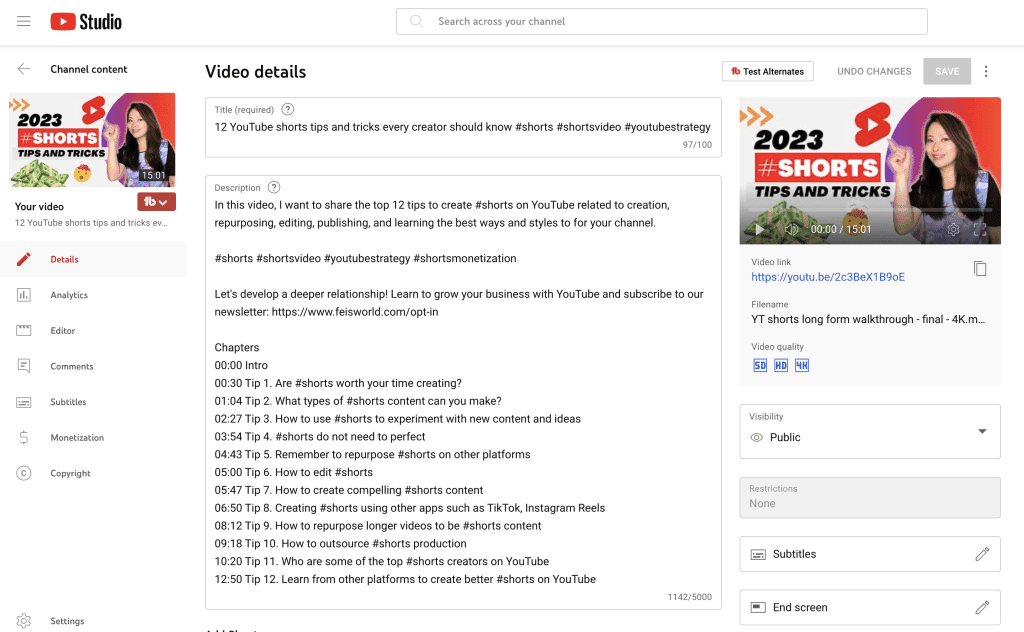
Inside the Description field, you can add “chapters” for your video, following the format of:
00:00 xxx
01:30 xxx
Etc.
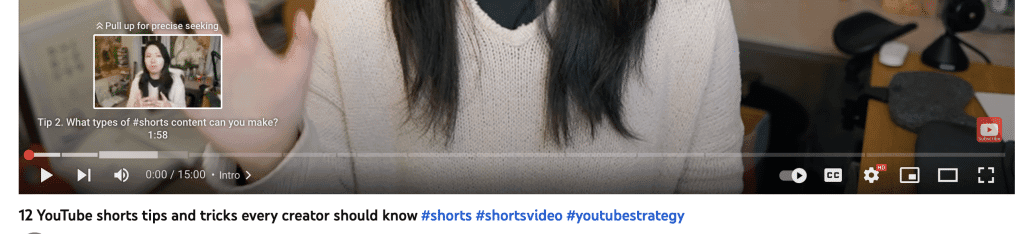
It’s important to start with 00:00, or else the chapter feature will not work on the video. How do you know that it’s working? See the image below – working chapters will allow you to hover with your cursor, and see a set of light grey lines on your video timeline. When hovering over each section, you’ll see a preview and the name of the chapter. Furthermore, you can click on each chapter to jump right to that section. It’s quite convenient for longer videos (generally longer than 5 mins)
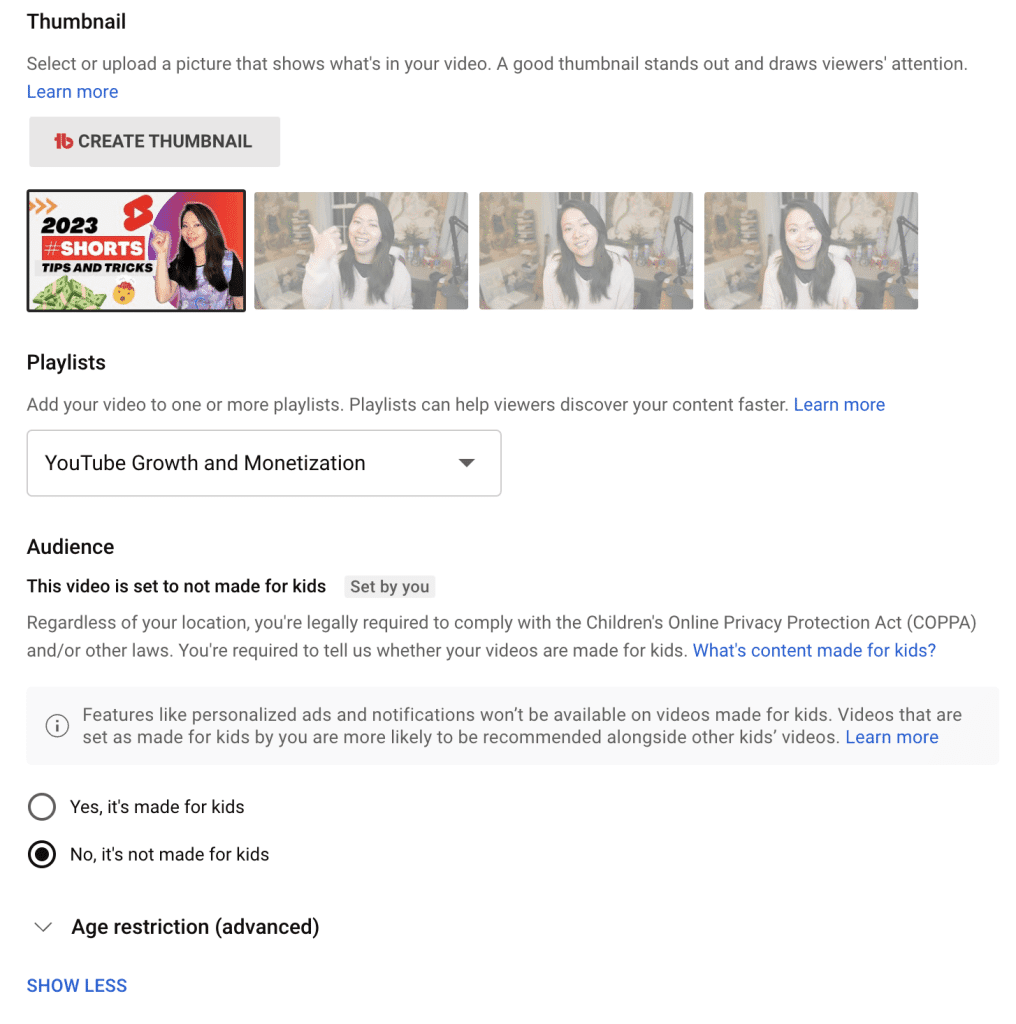
. Thumbnail, Playlists, Audience
Don’t just use the default screenshot from your video as the Thumbnail. Thumbnails are very important for viewers to click into and choose to watch your video. YouTube tracks this metric as “clickthrough rate”. You want to create something compelling – without too many words on the design – that incentivizes viewers to click. We love using Canva to design these thumbnails.
Avoid any clickbait type of design because you want to deliver on the promise.
If you have an existing playlist that contains similar video content, be sure to add this new video to that playlist. You can order and reorder the videos inside a YouTube playlist, see: How to Change the Order of Videos in a YouTube Playlist (2022 Update)
Lastly in this section are Audience and Age Restrictions. For our videos, we simply choose “No, it’s not made for kids”. This is the case for nearly all videos unless it’s specifically created for kids.
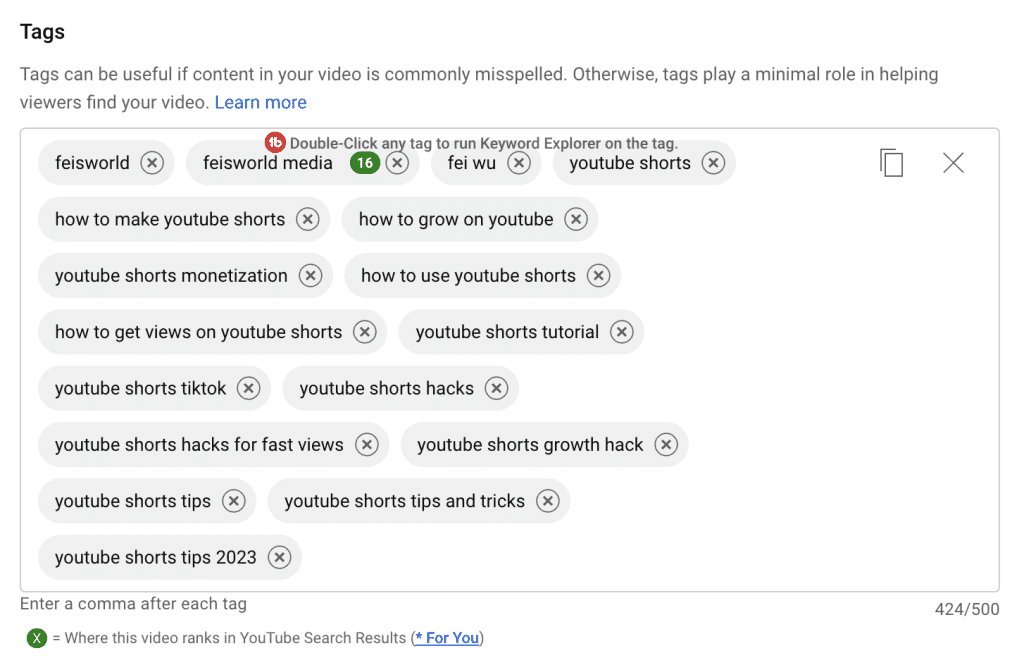
. Tags
Tags (or some people refer to them as keywords) are very important. Over the years, there has been debate regarding how many tags you should enter. The character restriction is 500. Some YouTubers will max out the number of Tags, and some choose to only use the ones that are most relevant to the video. There are no hard and fast rules around exactly how many to use – but it’s important to use relevant tags, as opposed to general and irrelevant tags to confuse the YouTube algorithm.
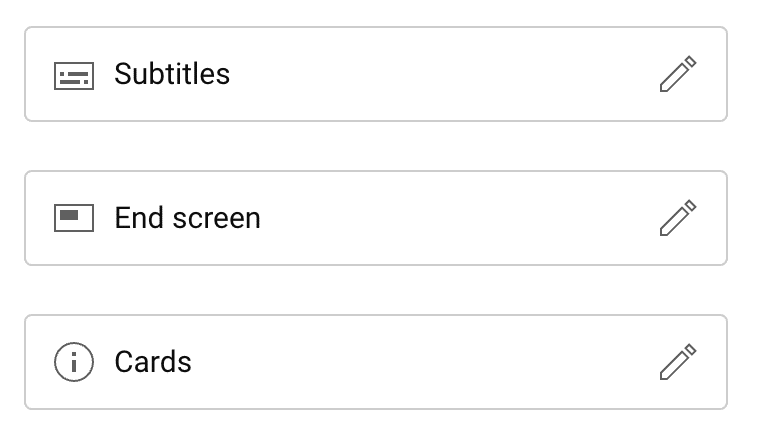
. Subtitles, End screen, and Cards
These options are on the right-hand side of the YouTube video upload page if you are using a browser. Don’t overlook these options.
Subtitles: YouTube already comes with automatic captions, and the ability to auto-translate your videos in dozens of languages. But you are also able to upload another version, such as a human-verified version of your video subtitles to your videos. This is the place to do that.
If you experience difficulties in finding the auto translations, watch this video.
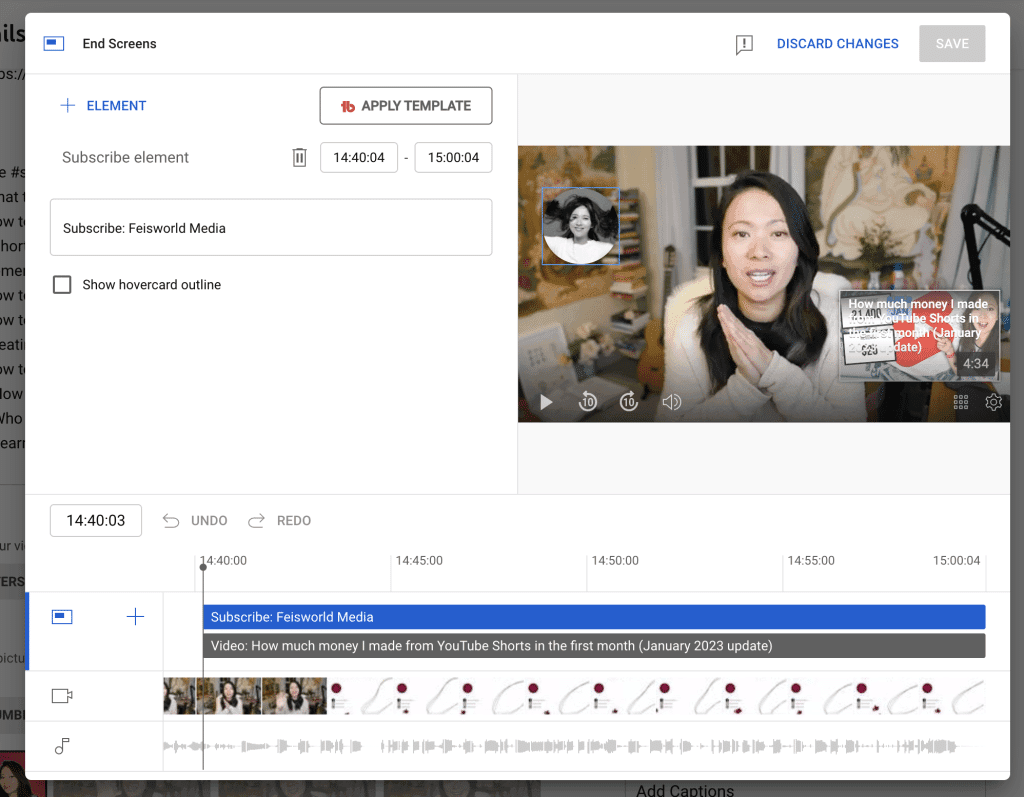
End screen is essential in revealing other related videos on your channel, and helps your viewers engage with you at a deeper level. By default, End screen appears in the last 20 seconds of your video, but you can change it to appear sooner or later by using the End Screens options.
You can also choose the Element to show to your viewers. The choices are the subscribe icon, a single video or a video playlist.
The subscribe icon and the video being displayed can be moved around on the screen, hence the light blue outline for these elements. This feature comes in handy if you have a busy video background such as mine, so I can move them around without covering my face while I’m speaking in the last 20 seconds of my video. 🙂
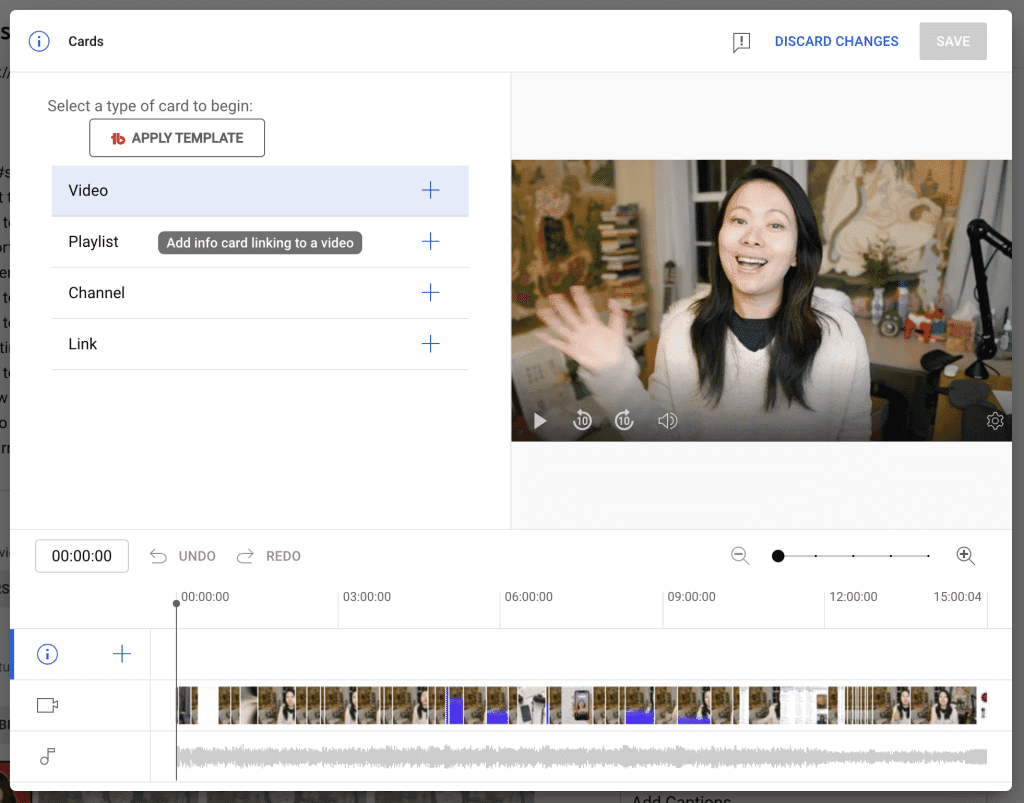
Cards are an essential feature for YouTube video upload. It’s used to reference other Video, Playlist, Channel or Link throughout the video, not just at the end of the video (which can be taken care of by End Cards).
For example: if you are speaking about an earlier video you have uploaded to your channel (let’s call it Part 1) and you want your viewers to watch that first, or at least be aware of the content, you can find that exact timestamp when you mention the message and insert a card to the video.
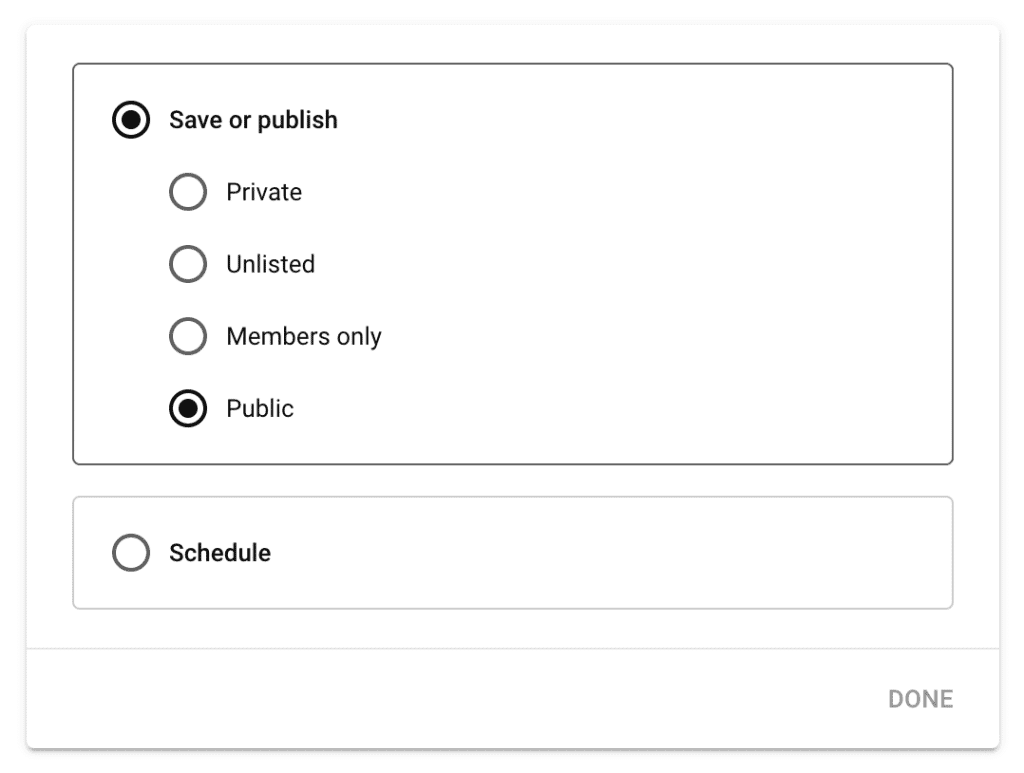
. Save or Publish, or Schedule
This is one of most important steps. Without saving, publishing or scheduling your video, all the effort above is wasted and your audience won’t experience your hard worked creation.
Here’s what they mean. Public (can be seen by anyone), Unlisted (only viewable by those with a link), and Private (only visible to the creator). You change the “default” video visibility under YouTube settings.
What about that “Members Only” option? Channels with memberships turned on can create members-only perks. Members-only perks are only available to your active paid members. Perks include custom emoji, badges, and access to other perks you offer.
Before you close the video upload page, be sure to select one of these options. I often use Unlisted for videos I just uploaded, but haven’t had a chance to go through the above steps just yet.
I also like the Schedule option a lot to save time. Batching your content creation is one of the best things you can do to save time and create consistent, high-quality content. If you want to reach the next level of YouTube content creation, consider this: How to Use Notion for YouTube and Video Content Creation
Done!
That’s it. Hope you’ve enjoyed the tutorial, and make sure to check out your channel Feisworld Media, and our free guides in the blog for the latest tips and tricks on using YouTube to grow your business.
Ready to start and grow your own YouTube channel?

Written by
Fei WuFei Wu is the founder and CEO of Feisworld Media, a Massachusetts-based digital media company helping brands get discovered by people and by AI. An Adobe Global Ambassador and brand partner to ElevenLabs, Synthesia, and 50+ other tech and AI companies, she hosts the Feisworld Podcast (400+ episodes, 500K+ downloads — guests have included Seth Godin, Steve Wozniak, Chris Voss, and Arianna Huffington) and co-created the documentary Feisworld: Live Your Art on Amazon Prime. Fei writes for CNET, Lifehacker, and PCMag, and her work has been featured in Forbes, Harvard Business Review, and WIRED. She has been publishing on the internet since 2014 — long before AI discoverability had a name.
View all posts by Fei Wu→Stay updated
Weekly insights on content, AI, and digital media.
Keep Reading
Related Articles

Ecamm Review 2026: Dual Mode Changed How I Create Video (Here’s How)

The Ultimate Guide to Adobe Firefly Video Generation: Choosing the Right Model for Your Project (2026)
