Podcasters On-The-Go: Achieve Great Sounds With USB Interface and Garageband


I had been traveling with a Yeti mic for a few years. Yeti is great for beginner podcasters. However, the challenge with using a single microphone is that you end with a single track, for however many voices you need to record. If one person is louder than the others, there’s no easy way to optimize the quality during editing. Hence, getting quality raw audio is key.
Thanks to my producer German, who offered a recommendation to up my recording setup while on the road. The process of hooking up two mics through a USB adapter does the trick! However, the setup process isn’t trivial, if you do not have an audio engineering background.
Here I’m demonstrating my exact setup using Scarlett Audio Interface and two Audio Technica mics.
To start, plug both of your mics into the Scarlette USB interface, then your Scarlette USB interface to your computer.
BTW, Scarlett Audio Interface is my favorite new edition to my home and on-the-go setup. It’s USB powered which you means you don’t a power cord. And it’s sturdy enough to pack in your luggage, throw in your car.
Once everything is plugged in nicely, open up GarageBand
1. Open a new project
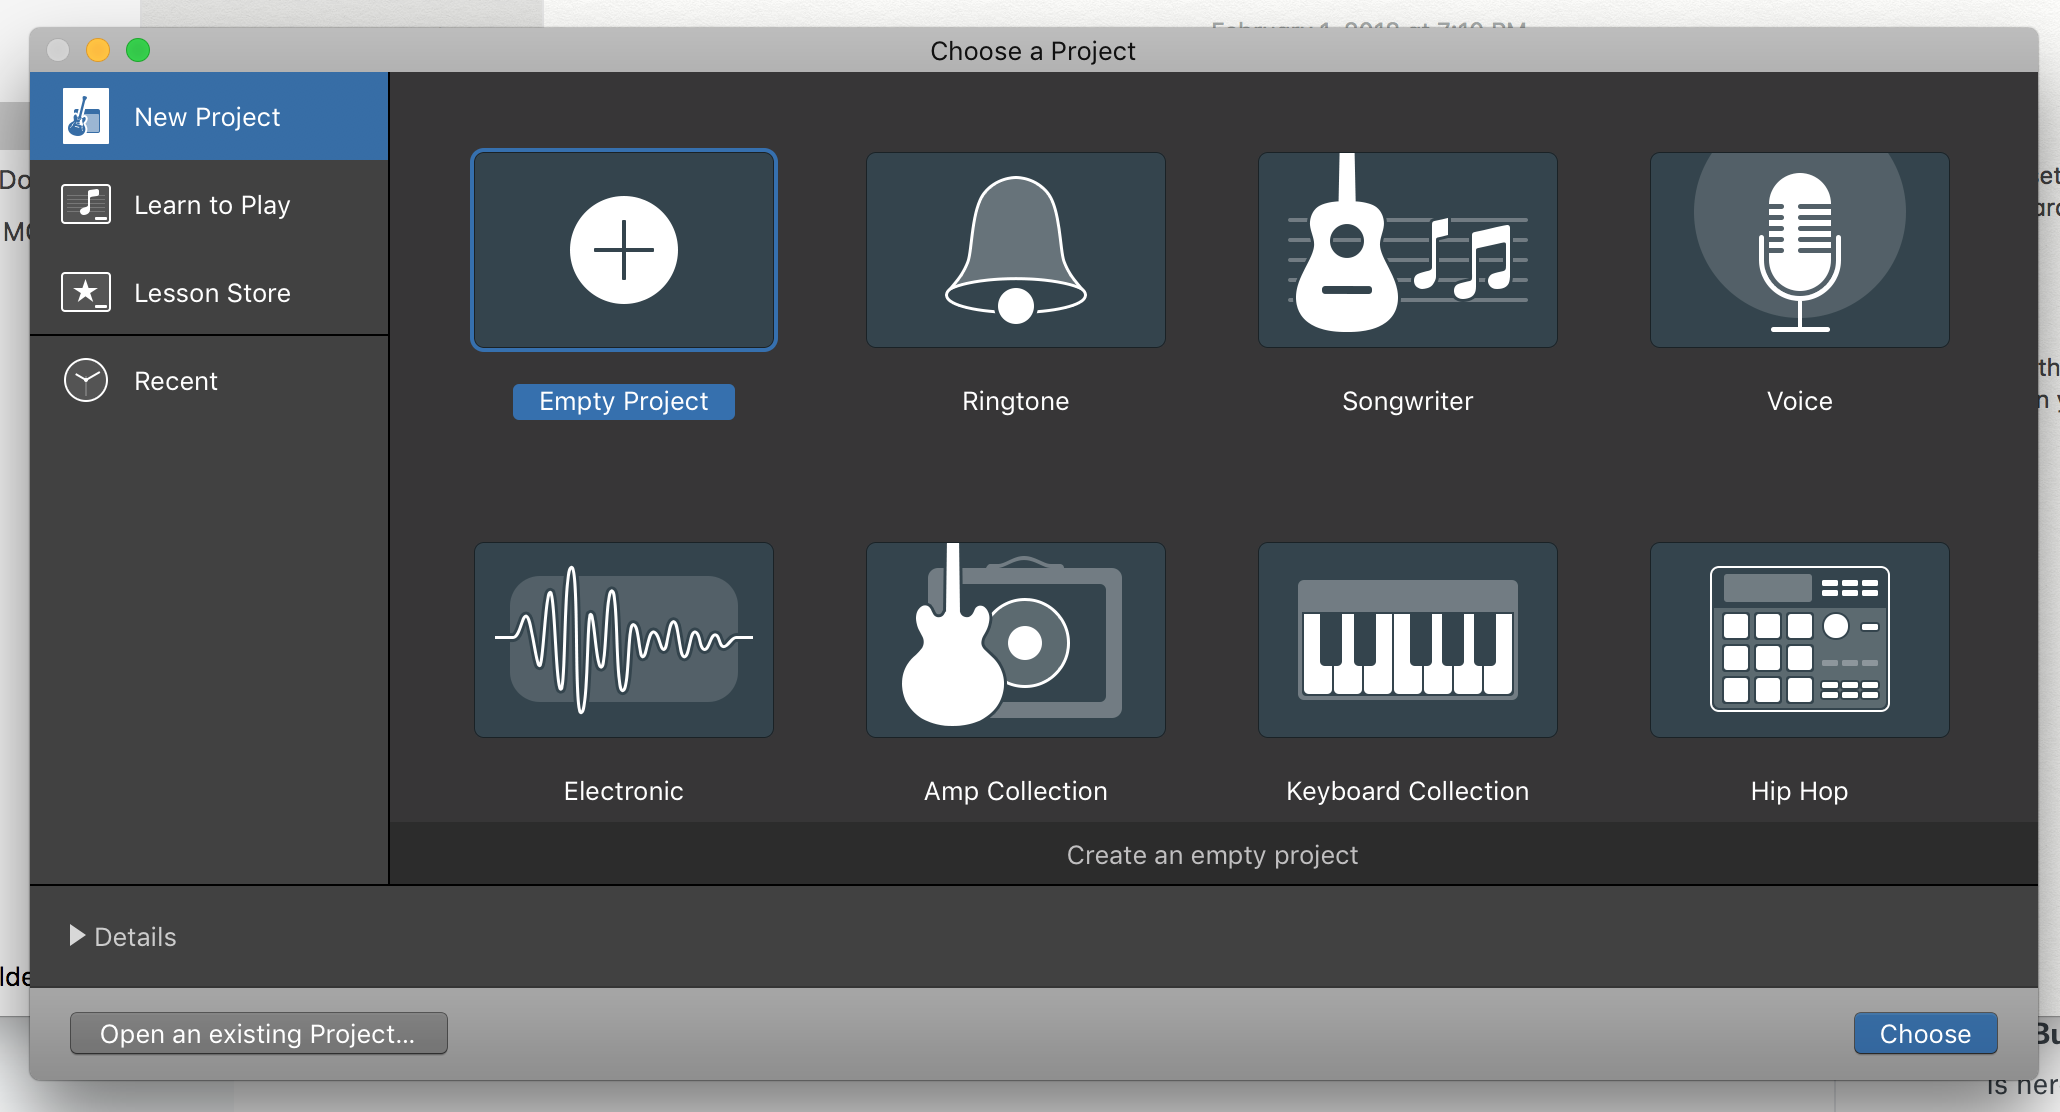

2. Choose Audio, “Record using a microphone…” and then you will notice the input type may or may not recognize your audio interface, if it says “No Input”. I was frustrated. Keep reading if this is the case for you.

3. Click the arrow “>” next to Built-in Microphone — if you have a microphone or audio interface connected, you will see this option.
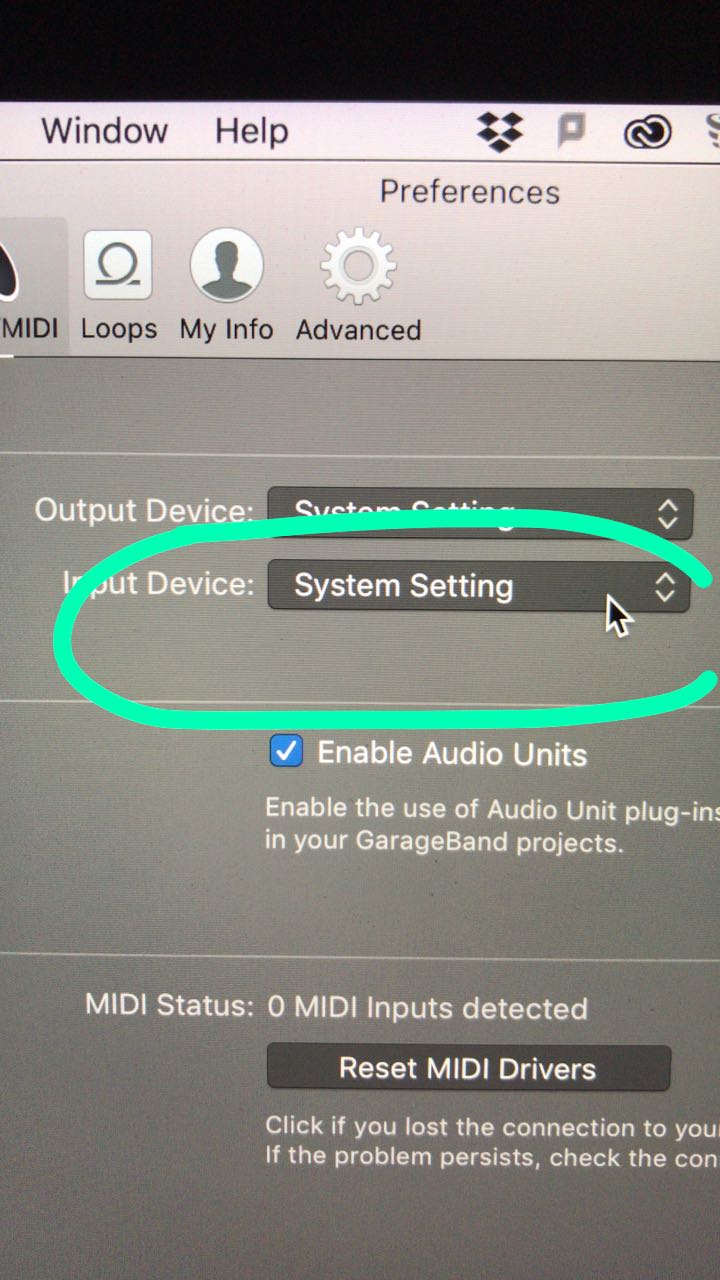
4. Once you click on “Built-in Microphone”, the following preference dialogue pops up. There, under Input Device, select your audio interface. In my case, it is the Scarlett Audio Interface
5. Now you can go back to the previous dialogue and you will see your audio interface recognized under Input.
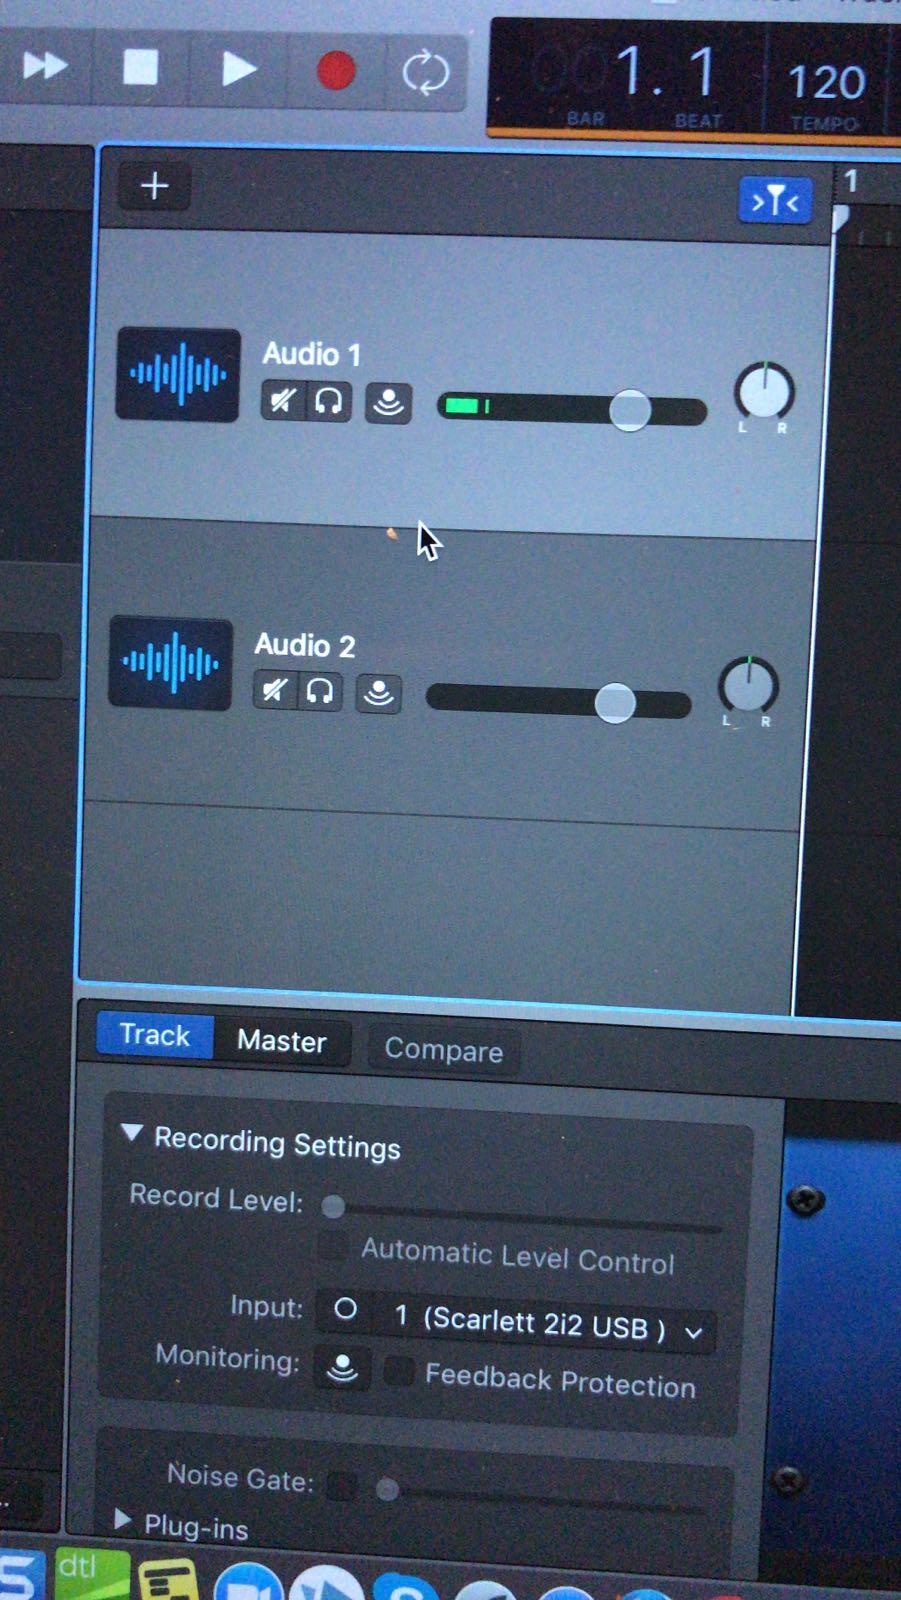
Select “Input 1” if you are using two mics. Hit “Create”, and you are taken to the recording dashboard. You will notice two Audio Tracks. If not, simply right click on Audio track 1 and select “Duplicate track with the same setting”. Alternatively, you can go through the same process by creating a new track under Track | New Track.
Here’s one more step if you want to record from both audio tracks. Hitting the big red button won’t do it yet!
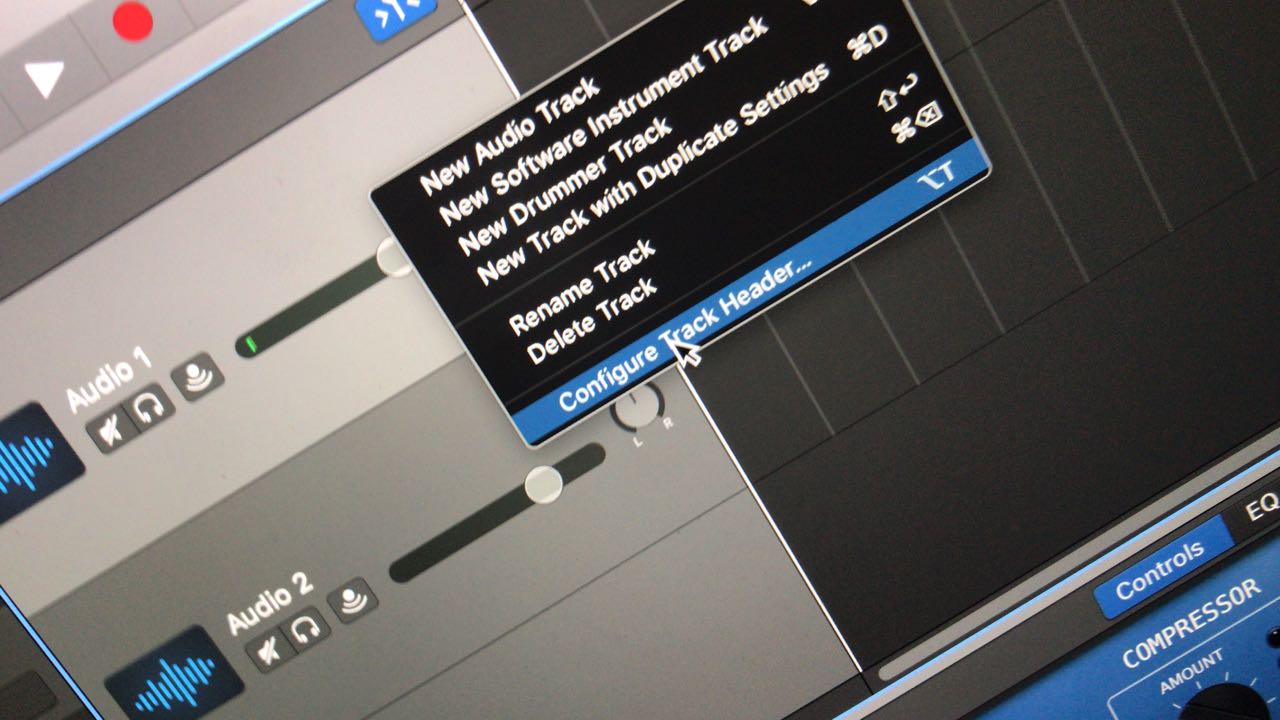
6. Right click on Audio 2, a menu opens with the following options displayed. Select “Configure Track Header…”
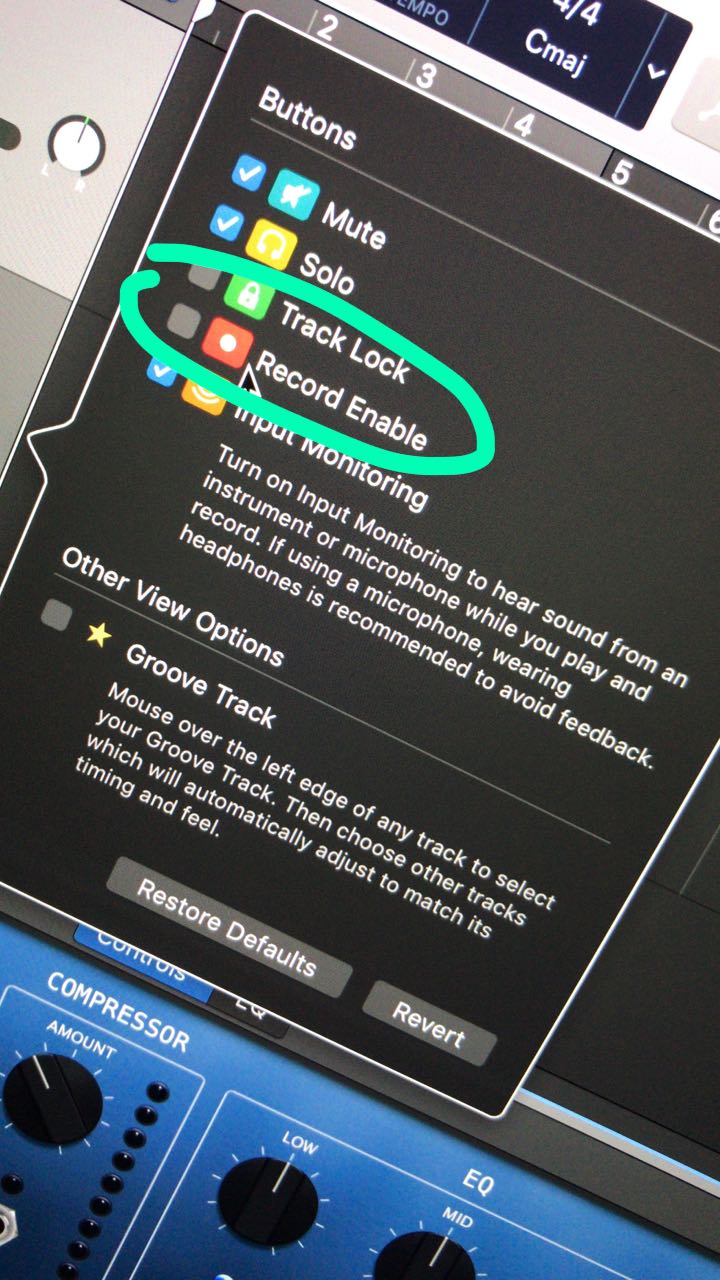
7. You need to manually select/check “Record Enabled”. Once done, click away from this pop-up and the settings will be saved automatically.
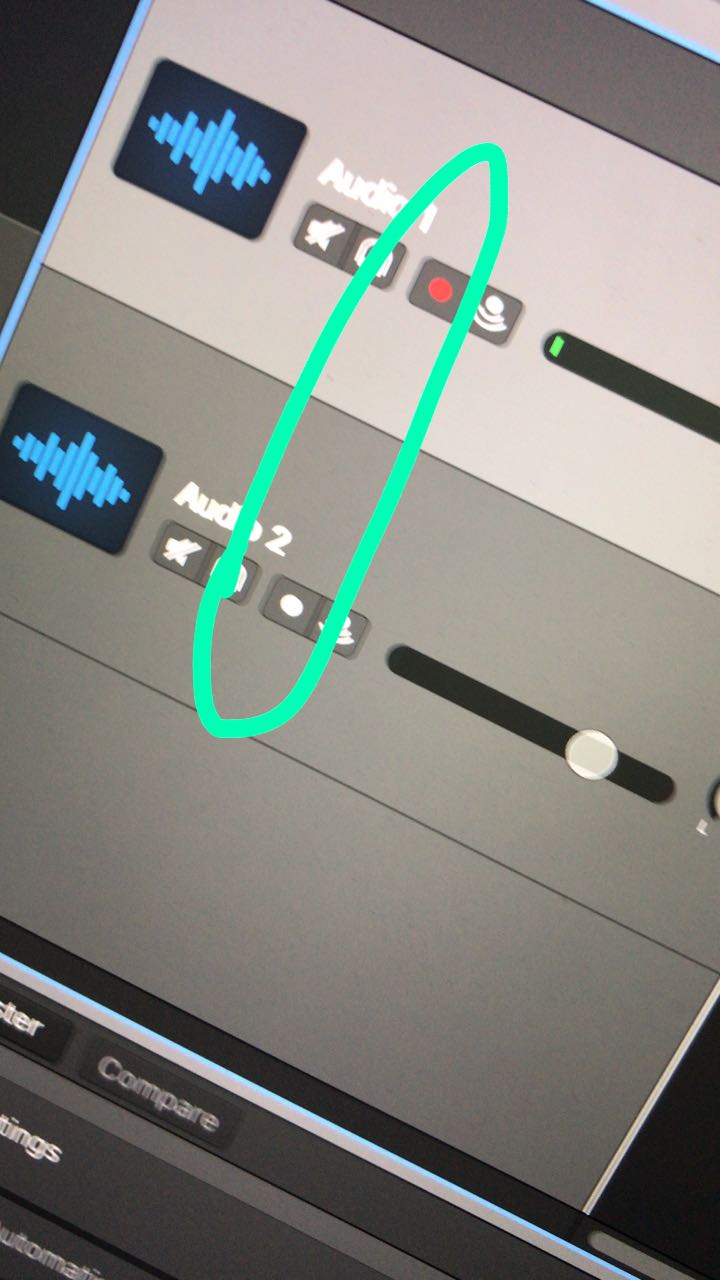
8. Now both tracks show the red record button next to it. Click on both buttons and they will begin to flash, which means they are ready to record!
Troubleshoot – if only one record button turns red and the other doesn’t, this might mean that both tracks are pointing to “Input 1”. If this is the case, go to Track | New Track and add a new track using “Input 2” in the Input field.
You may notice that there are now 3 tracks. Click on record button and notice that only two record indicators will flash (this means they are enabled for recording), and the third one can simply be deleted.
I recommend that you practice this setup a few times before you get on the road to ensure you know how to set it up.
Even better, save your settings with a GarageBand file and call it “Template”. This way you can duplicate this file and use the same setting for all your podcast recording moving forward.
Lastly, if you ever decide to switch audio interface (i.e. changing from Scarlette to Yamaha), all you need to do is to plug the new devices and mics in, then go to GarageBand | Preference. Then select “Audio/MIDI” to make sure your new audio interface is selected under “Input Device”. You are all set to go!
Always test new setups with both mics or more before you use it for recording. This ensures that you know exactly how it’s going to work (and if it works at all).
Hugs!
Fei

Written by
Fei WuFei Wu is the founder and CEO of Feisworld Media, a Massachusetts-based digital media company helping brands get discovered by people and by AI. An Adobe Global Ambassador and brand partner to ElevenLabs, Synthesia, and 50+ other tech and AI companies, she hosts the Feisworld Podcast (400+ episodes, 500K+ downloads — guests have included Seth Godin, Steve Wozniak, Chris Voss, and Arianna Huffington) and co-created the documentary Feisworld: Live Your Art on Amazon Prime. Fei writes for CNET, Lifehacker, and PCMag, and her work has been featured in Forbes, Harvard Business Review, and WIRED. She has been publishing on the internet since 2014 — long before AI discoverability had a name.
View all posts by Fei Wu→Stay updated
Weekly insights on content, AI, and digital media.
Keep Reading
Related Articles

Ecamm Review 2026: Dual Mode Changed How I Create Video (Here’s How)

The Ultimate Guide to Adobe Firefly Video Generation: Choosing the Right Model for Your Project (2026)
