
If you are reading this article, it’s probably because you are shopping for the best clear aligner for yourself, as an adult. By the way, I turned 40 recently (as I’m writing this) and started my Invisalign treatment a week ago. This is exactly what I’m trying to do in this series – reporting from the frontline as an adult wearing Invisalign – in treatment! I want to share my honest feedback without any reservations so you can better understand what it’s relaly like to get Invisalign as an adult.
On top of that, I’m a full-time creator and entrepreneur, who happens to record a ton of videos each week and speak with clients regularly on Zoom. Speaking and being on camera are main part of my career, therefore making choosing the right clear aligners an even important decision.
The good news is that so far I have no problem adapting to my aligners (even in week 1), including recording videos on YouTube confidently without much lisp.
Please note: I’m not a medical professional and these opinions and experiences are my own.
CONTACT ME FOR $100 INVISALIGN gift card
My dental condition and why I need Invisalign
First of all, I didn’t just wake up one day and decided I want clear aligners. Most people wouldn’t even notice that I need braces or aligners. My teeth look more or less “normal” as seen by the naked eye. However, when my dentist looked inside and mentioned that my teeth, particularly at the bottom, are a bit crowded – AND I have the tendency to grind my teeth at night, I became a good candidate to consider orthodontist treatment.
By the way, it’s worth noting that I never got braces when I was a kid growing up in Beijing in the 80s and 90s, so I figured it’s time to look into what I might need to maintain my dental health at this stage and as I age.
With full transparency, here’s my treatment plan after visiting my local orthodontist. I’ll talk more about the first complimentary visit in the sections to follow.
Many of the technical terms may not make sense to you, but in general, my condition is considered mild to moderate. I want to share these details so you get a sense for what treatment details may include.
What happens during your complimentary visit
Keep in mind that most orthodontists offer a first complimentary visit to check out your teeth and provide a treatment plan. Don’t take this visit lightly even though it’s free – and I highly recommend that you visit more than one orthodontist before deciding who you want to work with.
With that said, here is a list of typical activities that happens during your complimentary visit. The treatment coordinator will review your information, health history, insurance information, and any concerns about your teeth and smile.
Then the orthodontist will:
- Discuss how the treatment works
- Study your mouth and talk to you about your cosmetic dentistry desires
- Tell you if Invisalign is a treatment you should consider
- Examine your teeth to understand which teeth need to be aligned
- Identify any outstanding issues that might limit the effectiveness of Invisalign braces
- Take an impression and pictures of your mouth to analyze your teeth structure
CONTACT ME FOR $100 INVISALIGN gift card
How I decided on Invisalign
As someone who is a candidate for Invisalign (by the way, most of us are these days as the technology has advanced a lot over the past two decades), I was inclined to consider it given:
- I have several friends who have tried Invisalign and liked the results
- Invisalign was frankly the only solution I was aware of before investigating other options which seem quite good (and cheaper)
- Overall I do not regret my decision given Invisalign offers the best in-office service, and can help treat more difficult cases. Although mine is mild, I would feel more confident choosing a brand that I feel most familiar with
The decision is yours and taking your time to choose the right option is key.
As for me, I figure this is going to be the one and only orthodontics treatment I will have, so might as well go with the product that’s most effective, even if it costs more.
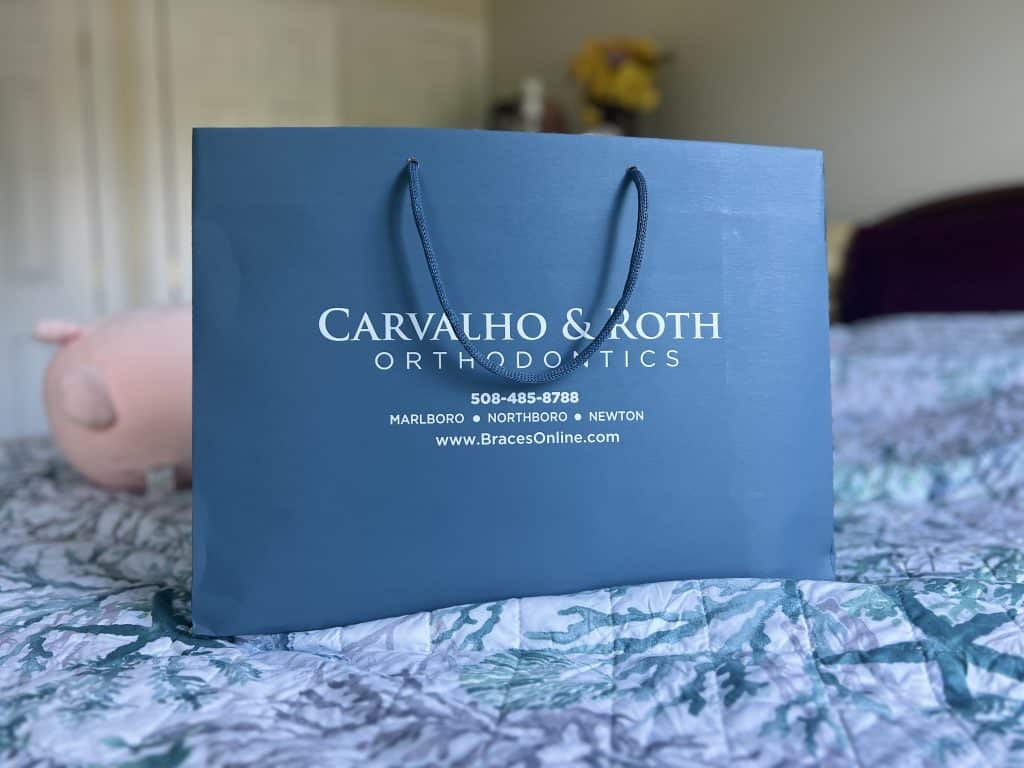
How I decided on my orthodontist
Because orthodontist treatment including Invisalign can be quite costly and time-consuming, it’s not a decision you want to rush into (similar to buying a house I think!). Shopping around will help you understand the process better, and compare different orthodontists, offices, and support staff. That’s right, you will be dealing with the staff A LOT, more so than the orthodontists. Everyone in the office matters to ensure your treatment is effective and pleasant.
I scheduled two appointments with two different orthodontist offices. The first one felt rushed, and the staff took very little time to talk to me, very few scans were taken. The second office took many more scans. I remember feeling intrigued by the advanced technology shown in the office, and the office itself is flawlessly decorated and exceptionally clean. The second orthodontist also took quite a bit of time to walk me through the process, answered my questions, and even showed me an example of how the teeth will move over time to achieve the result. He was frank with me and said I didn’t have to rush into treatment – “could be this year, or the year after”, he said. That left me feeling that I can do this when I’m emotionally and financially ready.
How much Invisalign costs for me (and what it includes)
My treatment plan was just shy of $6,000 (for about 25 weeks, instead of the usual 12-18 months). This is considered a mild case given some Invisalign treatments will easily go on for 12-18 months. The first orthodontist I visited quoted about $1,000 less. However, it didn’t feel right for me to move forward with that office. I’m glad that I made the right choice to work with doctors and staff members I trust.
I think it’s also important to call out hidden costs. For example, my treatment plan includes retainers that are needed immediately after my Invisalign treatment. You should know that you will need retainers for the rest of your life, as long as you want your teeth to stay straight. Retainers are often worn for a longer period of time for a few months after the treatment, and then gradually you only need to wear it at night. Again, this depends on you what your orthodontist recommends for you.
I’m not sure exactly the retainers I’ll be getting yet. Some of them last for years, some for less. Retainers can cost $99 or more per set, which means they can add up quickly. Be sure to talk to the office you are visiting about what the cost includes and doesn’t include.
Services included in your cost is another big ticket item. You will need regular access to the staff members, sometimes your orthodontist too to address your questions and concerns during your treatment. In-office follow-ups should be included in your cost.
Getting the scan done before ordering Invisalign
Once you make your decision and sort out finances to move forward with Invisalign, the next step is to inform the office and they will schedule a final scan before ordering Invisalign for you. Typically they will:
- Use a 3D scanner to get an image of your teeth
- It usually takes about 4 weeks after the dental scan until the Invisalign treatment officially begins
- And the payment is due on that day and you should be prepared for it. This means you should inquire about payment options prior to this visit. As for me, I had chosen a monthly plan with a 0% interest rate. This did require me to put a down payment of about $1850.
Getting the Invisalign (what happens on Day 1 in the office)
After waiting for my Invisalign to show up which took about 3 weeks, I had an appointment to receive them in person.
0. Download the DentalMonitoring app

The DentalMonitoring app is free and available on both Android and iOS. This is going to be an essential app you will need to monitor your Invisalign progress. I recommend you download the app before you pick up the Invisalign app. Once you arrive, the staff member will walk you through the login process. You will also be able to log in once you become a patient of Invisalign (or other similar treatment brands).
1. A technician put a series of attachments on some of my teeth
Attachments are tiny tooth-colored “bumps” that are bonded to the teeth using dental composites. They will be placed at precise locations to allow the aligners to grip the teeth as they are guiding them to their new locations.
The technician will need to completely try your teeth with air before applying the attachments. This wasn’t painful at all, but I do have a few sensitive teeth and could feel the air blowing on them. The air felt a bit cold but the feeling goes away after a few seconds.
Funny feelings with the attachment? Yes, I did sense that for the first day or two as if food is stuck in my teeth! But surprisingly your mouth does get used to these small attachments and the feeling quickly goes away.
By the way, the attachments are attached only once, and you will be using them for the rest of your treatment. Kinda cool, right?
2. Testing to see if the attachments fit nicely with a template
The technician will then put what’s called a template over the attachment to ensure the Invisalign will be fitting nicely.
3. You will practice how to put the aligners on yourself (be patient)
Now you get the real and first set of aligners. My technician showed me how to put the actual Invisalign over the attachment. Given my many years of experience wearing nightguards, it was fairly easy for me to learn how to do it. The Invisalign feels good in quality and very durable. I have an upper and a lower tray as indicated on the actual aligners. When they pop on, you hear a clipping sound.
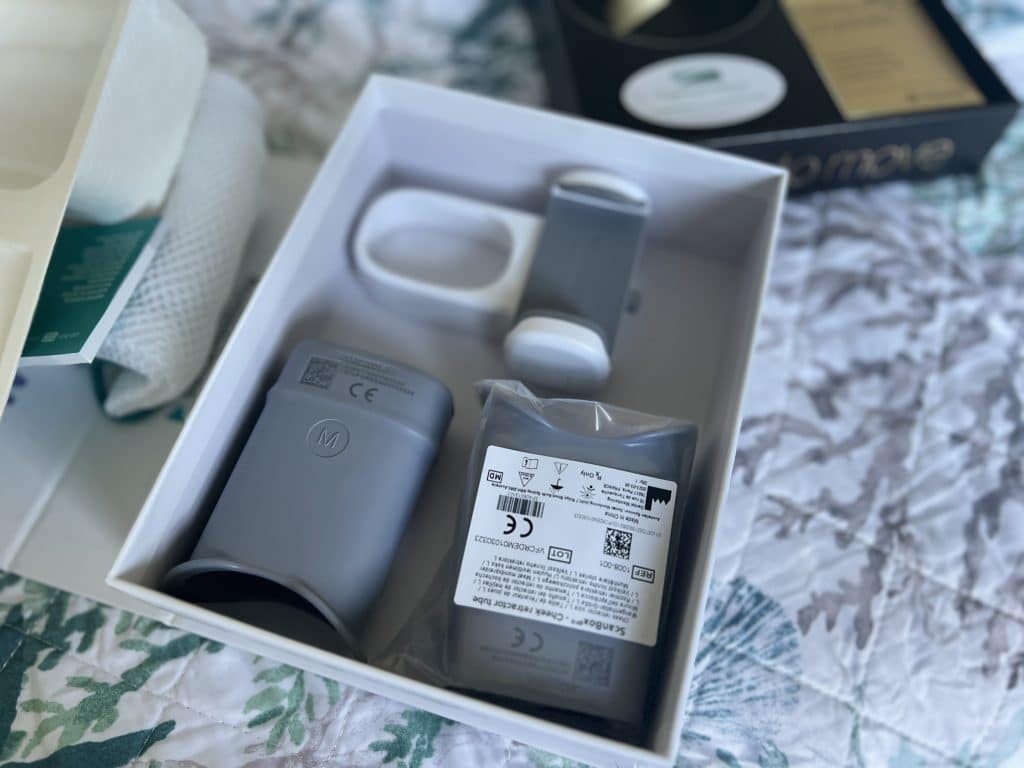
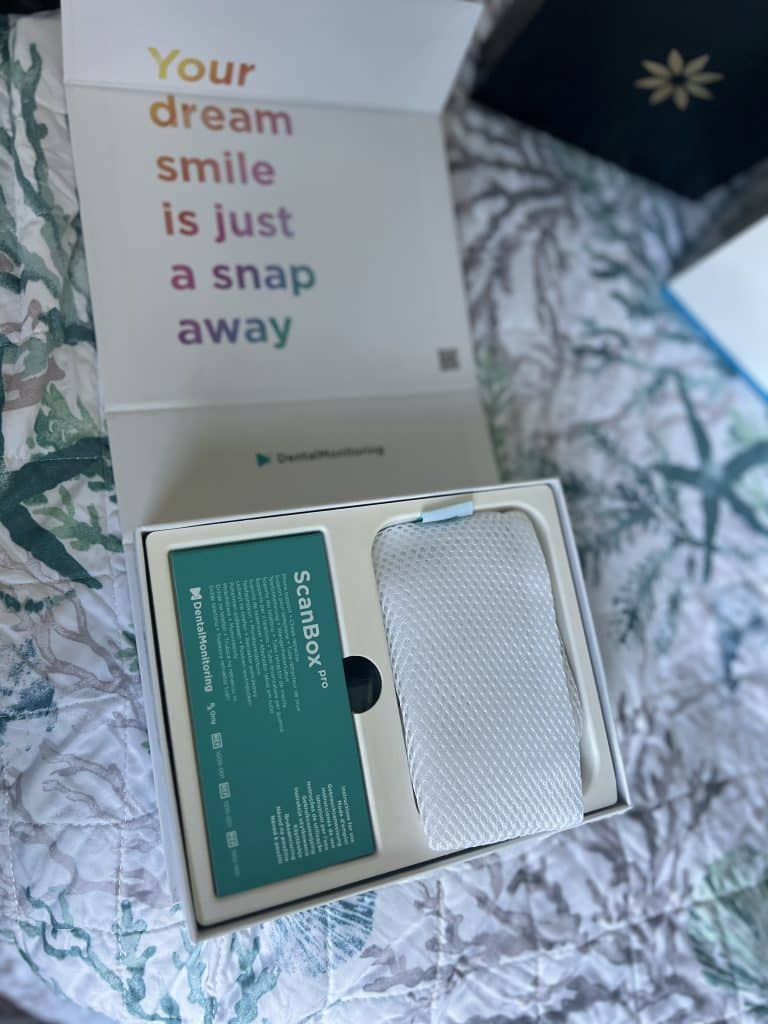
4. Learn to use the ScanBox
Finally, the technician showed me how to take photos using the ScanBox with the DentalMonitoring app. Here’s how it works with a comprehensive video that walks you through everything you need to know. Please let me know in the comments below if it helps to create a separate blog post that demonstrates the process of the DentalMonitoring app.
By the way, this is possibly the most futuristic part of the experience. The scan felt easy to do by following instructions. Within 1-2 hours, I got a message from a real dentist who reviewed my scan and confirmed it was usable and good to go.
5. Practice putting on and taking off aligners
A good orthodontic office will spend some time with you to be sure that you are comfortable with wearing the aligners. Please be patient with yourself. The aligners aren’t the easiest to put on or take on at the beginning for two reasons:
- You are new to Invisalign. It takes time to practice with these aligners
- New aligners can be a little tighter and take time to “break in”
As a result, you might just need to take your time trying them on while you are in the office. Don’t forget to ask them questions and have technicians show you what might work better for you.
For example, Invisalign just came out with a set of small hooks that can help you take off aligners. But they urge that you use only Invisalign branded hooks and not others you find online.
At the beginning I found myself needing the hooks more. After a few days, the aligners feel less snugged and I was able to take them off more easily by grabbing onto the inside of my aligners towards the back corners of my mouth.
Why inside the aligners? Because the attachments are installed on the front surface of your teeth. Taking aligners off from the inside is easier and helps reduce the risks of accidentally knocking off the attachments.
What happens if the attachments do come off? Rest assured, your orthodontic office will be able to arrange to attach them again. I was told that it doesn’t happen often at all.
CONTACT ME FOR $100 INVISALIGN gift card
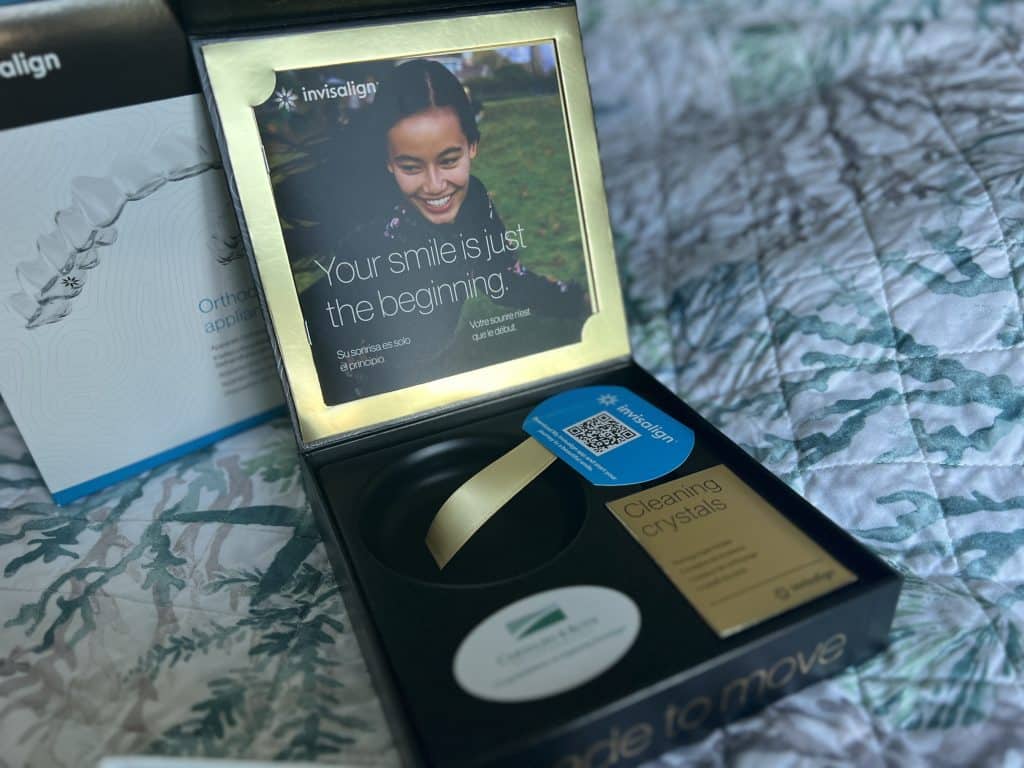
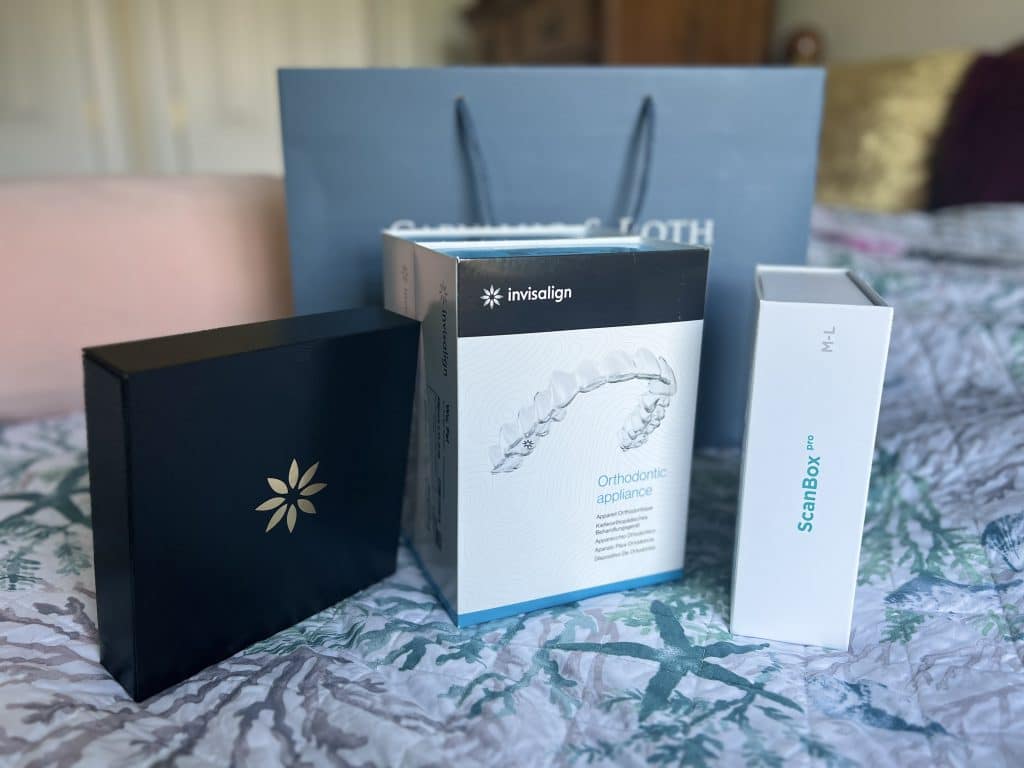
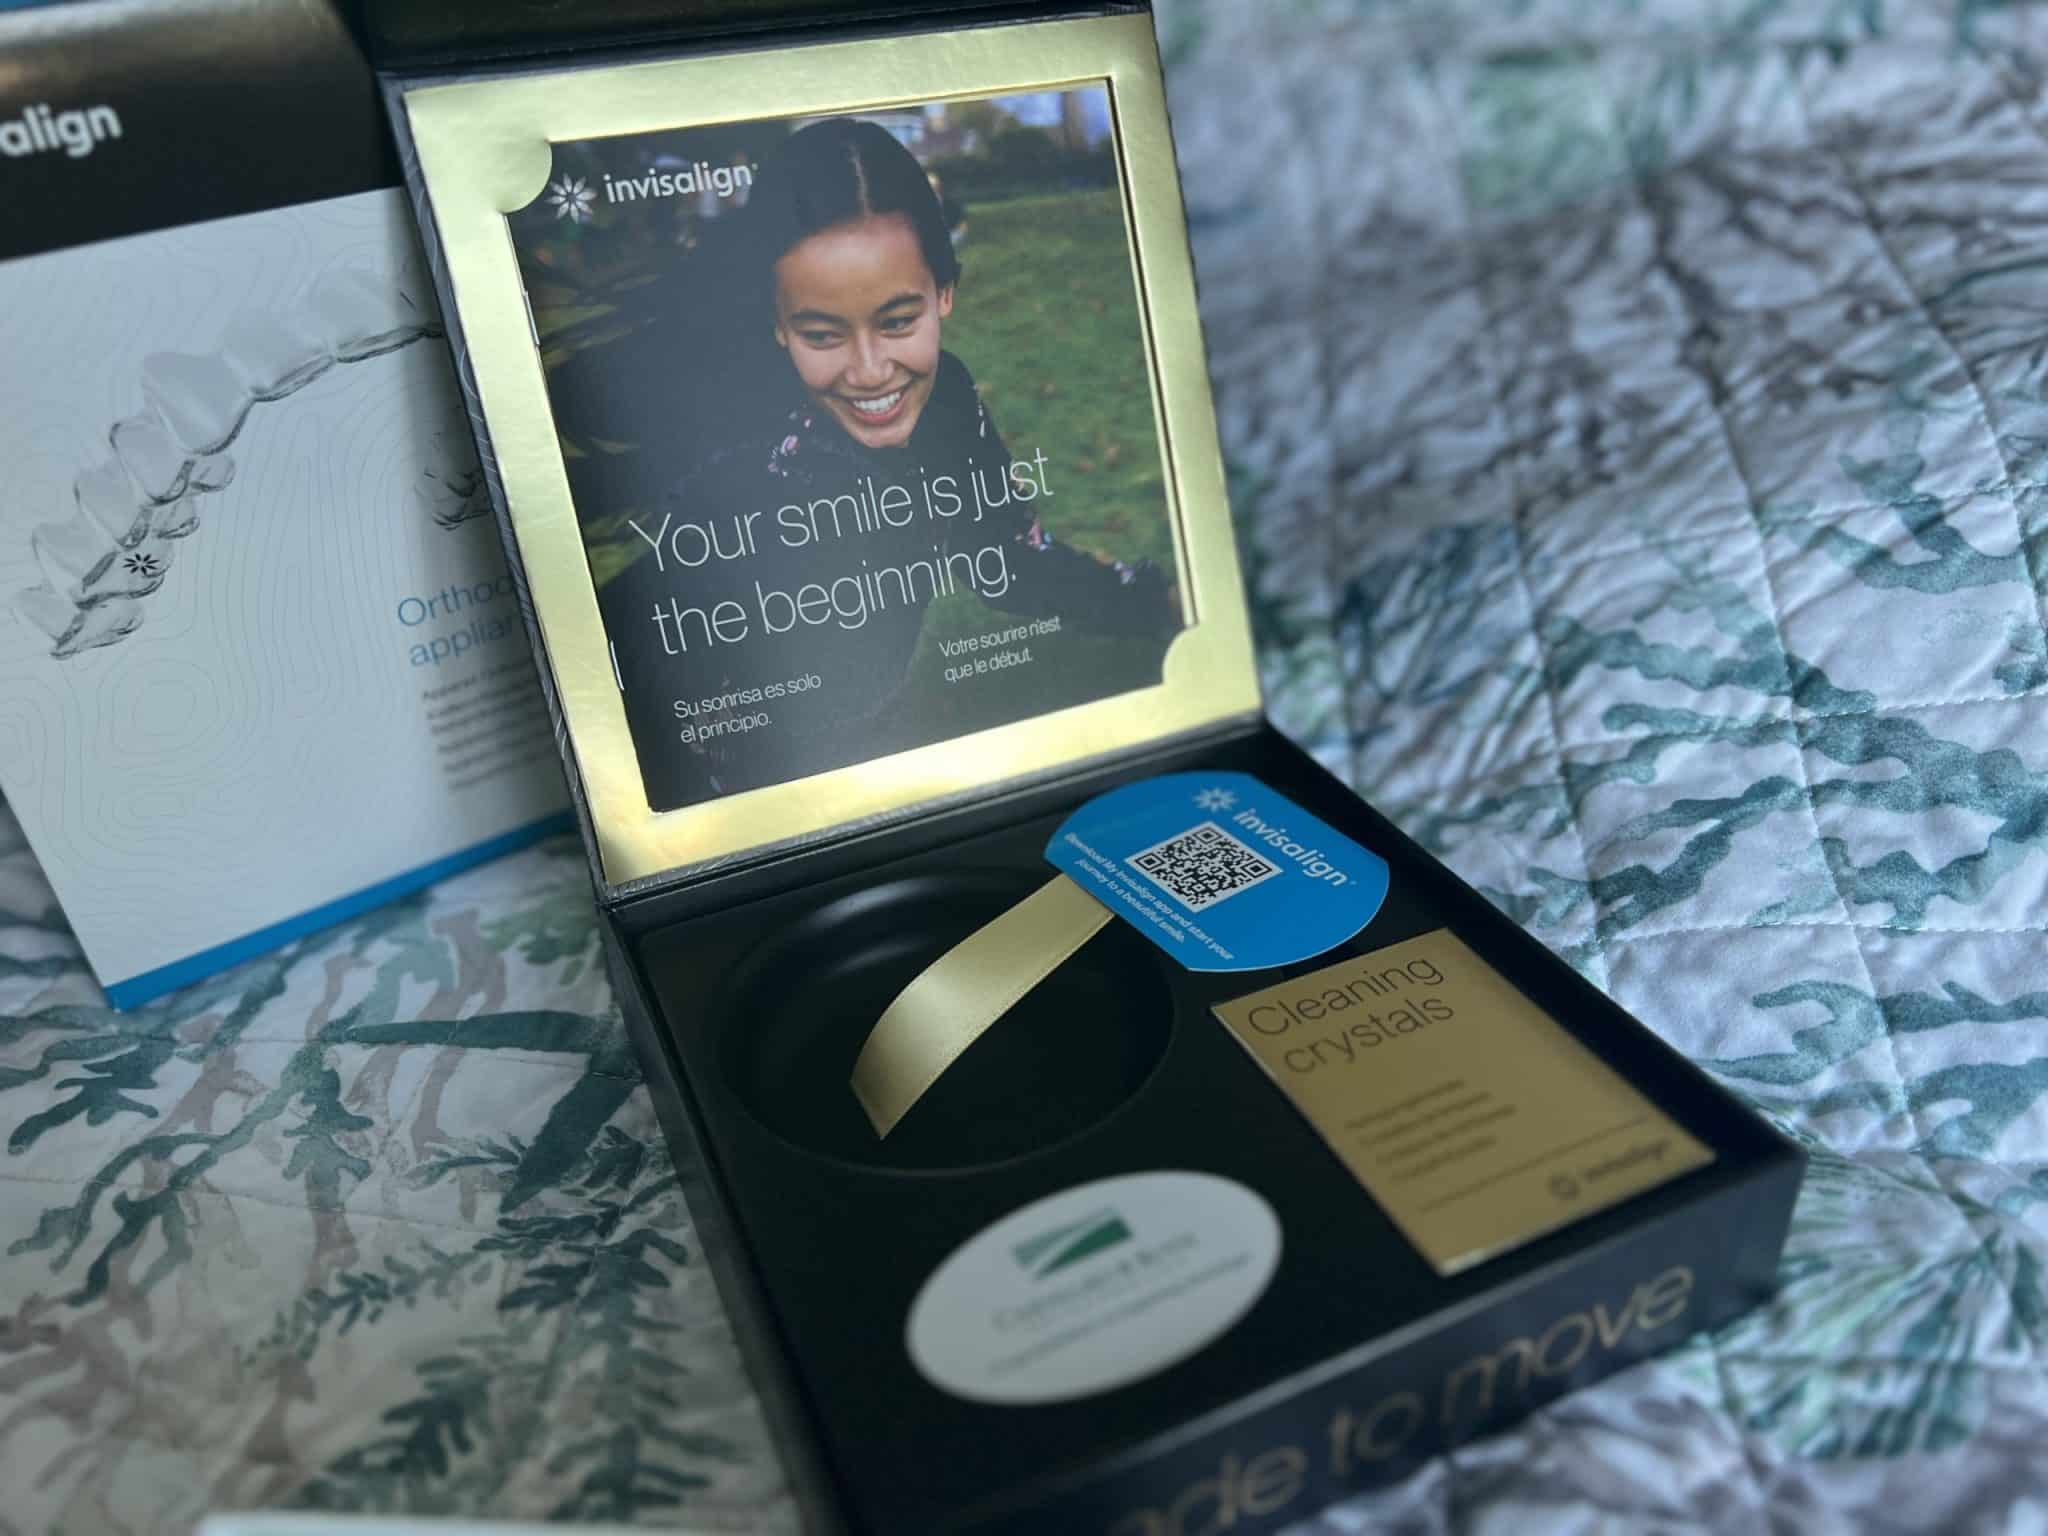
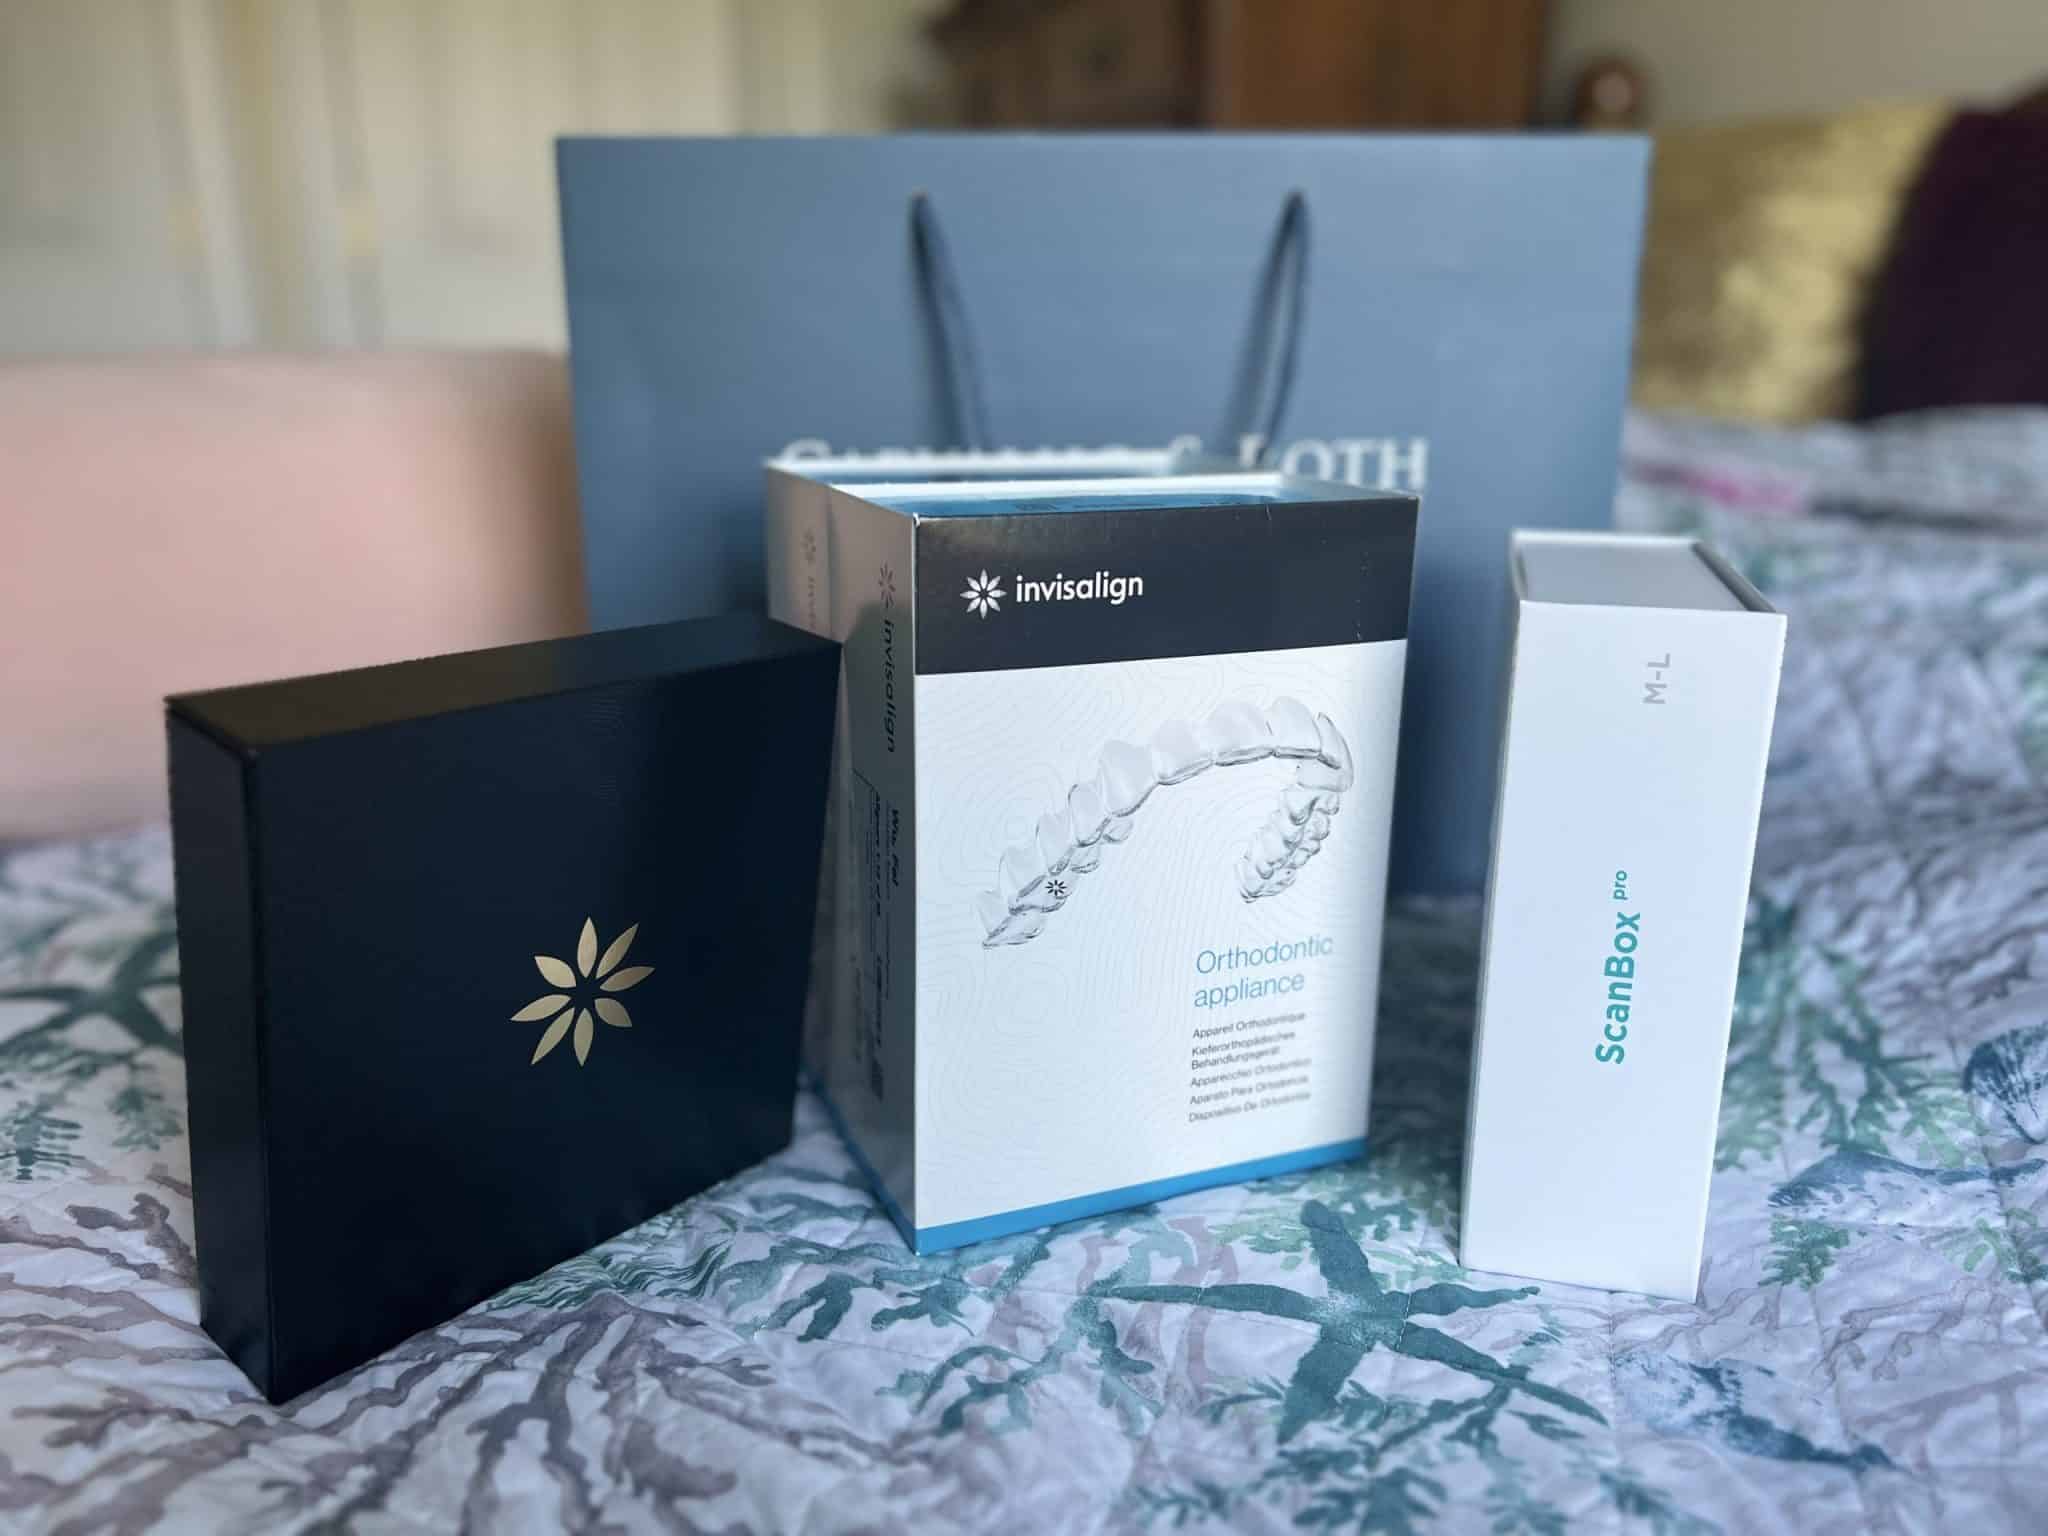
The Invisalign “Package”
The package and design of Invisalign feel quite luxurious which I didn’t expect at first. In this package, you will receive:
- A black box that contains the aligner holder and other accessories such as the hooks/picks.
- Your entire set of aligners. I have 25 of them. Instructions to wear new ones will come through as notifications inside the DentalMonitoring app – for me it’s generally going to be once a week.
- ScanBox, which contains the attachment for your mobile phone to scan and upload the progress of your treatment.


How to get through week #1 with ease
Perhaps the most important and intriguing part of the experience is the first few days and weeks of wearing Invisalign.
Discomfort? Pain? Mine was minimum
- At least for me, the experience was really easy at the office. The aligners felt like gloves on my teeth and they fit perfectly without irritating my gum or my tongue. Unlike night guards, they felt light and less noticeable.
- By the time I got home and a few hours in, I started to feel like they are “kicking in”. Not pain, but a general sensation of pressure.
- I didn’t need painkillers though it’s recommended for people who experience more pressure, pain, and general discomfort.
Unintended consequence & the biggest change in my lifestyle
The biggest change and perhaps transformation even within the first few days is that I snacked A LOT LESS. I love sweets and eating small portions of snacks and fruits around the house, multiple times a day. Given the fact that each time I eat and drink anything that isn’t water, I will have to:
- Remove the aligners
- Rinse and wash the aligners with a drop of soap
- Go eat something that isn’t water
- Brush my teeth
- Put my aligners back on
These simple steps felt daunting for the first few days. I ended up snacking and eating a lot less. My friends started to tease me about unintended weight loss, or perhaps building new and better habits.
No wonder why companies like SmileDirectClub have become quite popular by offering options that do not require you to wear aligners all day (minimum of 20-22 hours like Invisalign).
Dos and Don’ts with Invisalign
- Wear aligners 22 hours per day
- Remove your aligners ONLY when eating or drinking anything except water
- Brush the inside and outside of the aligners gently each time you brush your teeth
- Rinse your aligners with water each time they are removed
- Keep aligners in the plastic case provided when not being worn (don’t put them in a napkin because you will risk throwing them out by accident!)
- Do not advance to your next aligner until you receive a message on the Dental Monitoring app to do so. This may take up to 12 hours after you have taken your scan.
- Save the previous aligners in the sequence. Place in a labeled bag for efficiency. You may need to go back to your previous aligners
- Attachments and interproximal reduction are done in order to help teeth move more passively and for retention purposes. Both are necessary to treat effectively
Add costs if and when
These costs may depend on the orthodontic office. For example:
- There may be a fee to replace lost or broken aligners
- There will be a fee to rescan due to non-compliance (ask your office staff about what this might mean in relation to their policy and guidelines)
“Non-compliance” generally means when a patient does not follow the guideline of Invisalign treatment. Such as not wearing the aligners for 22 hours a day, or eating/drinking with the aligners which the aligners are not designed to do, etc.
CONTACT ME FOR $100 INVISALIGN gift card
Conclusion: Is Invisalign easy to adapt?
Hey so far I’m pretty happy with it, and I do intend to share the progress with you all, plus the final picture post-treatment. As I’m writing this article, I first had mixed feelings about not researching for cheaper alternatives enough before deciding to move forward with Invisalign. On the other hand and by looking at this helpful comparison table provided by Everyday Health, I noticed the importance of paying attention to categories such as “Treatment Type”, “Issue Complexity”, and “Lifetime Guarantee”. They speak volumes about the treatment quality, making Invisalign still a solid option after all.

Ultimately you have to decide what matters to you most, AND it’s really important to pay visits to these offices whether it’s a traditional orthodontic office, or a more modern brand discovered online. Having a reliable physical location and a trustworthy team of doctors and staff still rank high in what matters to me.
I’m curious. When it comes to clear aligner treatment, what matters the most to you? Please let me know in the comments below.
You might also enjoy…

Written by
Fei WuFei Wu is the founder and CEO of Feisworld Media, a Massachusetts-based digital media company helping brands get discovered by people and by AI. An Adobe Global Ambassador and brand partner to ElevenLabs, Synthesia, and 50+ other tech and AI companies, she hosts the Feisworld Podcast (400+ episodes, 500K+ downloads — guests have included Seth Godin, Steve Wozniak, Chris Voss, and Arianna Huffington) and co-created the documentary Feisworld: Live Your Art on Amazon Prime. Fei writes for CNET, Lifehacker, and PCMag, and her work has been featured in Forbes, Harvard Business Review, and WIRED. She has been publishing on the internet since 2014 — long before AI discoverability had a name.
View all posts by Fei Wu→Stay updated
Weekly insights on content, AI, and digital media.
Keep Reading
Related Articles

Best Smart Locks for Your Home in 2026 (Researched & Compared)

The Day I Interviewed Jack Canfield (After Reading Chicken Soup 60 Times)
