Previously on this blog, we talked about Synthesia: The All-In-One AI Video Creation Platform for Business (2024) and its many practical features and applications. With that said, I was eager to create a custom avatar of me using Synthesia (both webcam avatar and studio avatar). That’s exactly what I did! I’m here to share my experience creating my custom avatars using both a webcam and a regular camera.
Let’s get started!
What are custom avatars?
“A custom avatar is a realistic digital version of yourself. Designed in the same style as our stock avatars, they capture your unique likeness. With custom avatars, you can create personalized videos in 120+ languages.” – Synthesia
Digital avatars are graphical or visual representations of real people in online platforms, forums, social media, gaming environments, and virtual worlds. A custom avatar means that the user has chosen or created a specific image, icon, or character to represent themselves, rather than using a default or generic avatar provided by the chosen platform.
What can you do with a custom avatar?
While there are many ways to use a custom avatar, we want to focus on business settings for this article. Custom avatars can be utilized in various ways to enhance communication, engagement, and training. Here are some potential applications:
- Sales Videos:
- Personalization: Custom avatars can be tailored to represent sales representatives or customer service agents. This adds a personal touch to sales videos, making them more relatable to potential clients.
- Multilingual Support: Avatars can be used to deliver sales pitches in multiple languages, providing a versatile and inclusive approach for global audiences.
- Training, E-learning and Online Courses:
- Simulation and Demonstration: Custom avatars can be used to simulate real-world scenarios for training purposes. This is particularly beneficial in industries where hands-on training is challenging or expensive.
- Consistent Training Material: Custom avatars ensure consistent and standardized delivery of training content, eliminating variations that may occur with human trainers.
- Virtual Meetings and Presentations:
- Presenter Avatars: Custom avatars can represent presenters in virtual meetings or presentations, adding a visual element to the communication.
- Language and Accent Neutrality: Custom avatars can be used to present information without any specific accent or language bias, ensuring a more neutral and inclusive environment.
- Brand Representation:
- Brand Mascots: Custom avatars can serve as digital representations of brand mascots, helping in brand promotion and recognition.
- Consistent Branding: Custom avatars can be designed to align with the company’s branding, ensuring a consistent and professional image across various communication channels. Please note: with Synthesia, you can brand avatars (non-custom avatars) with different outfits, and logos too.
Video Tutorial
Webcam vs. Studio AI avatars
Before we get started explaining how to create your custom avatar, it’s important to understand which setup is best for you.
Which avatar do you need?
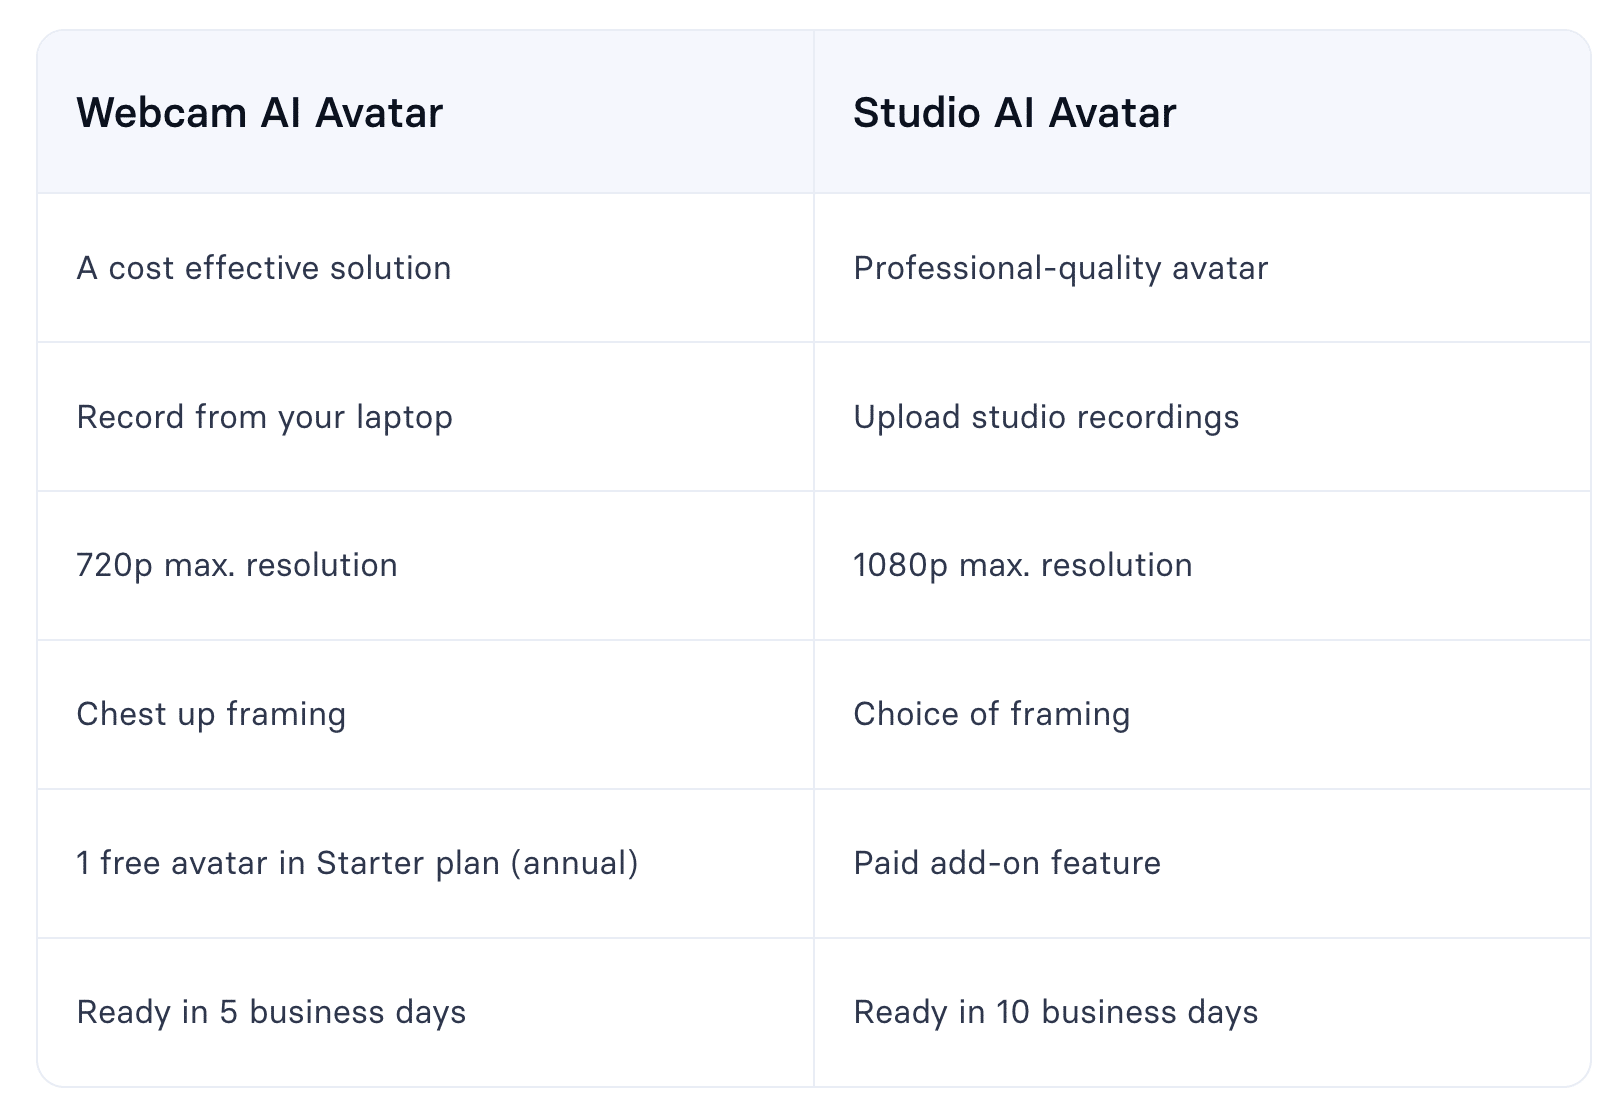
Remember that you can choose between two setups: Webcam AI Avatar, or Studio AI Avatar.
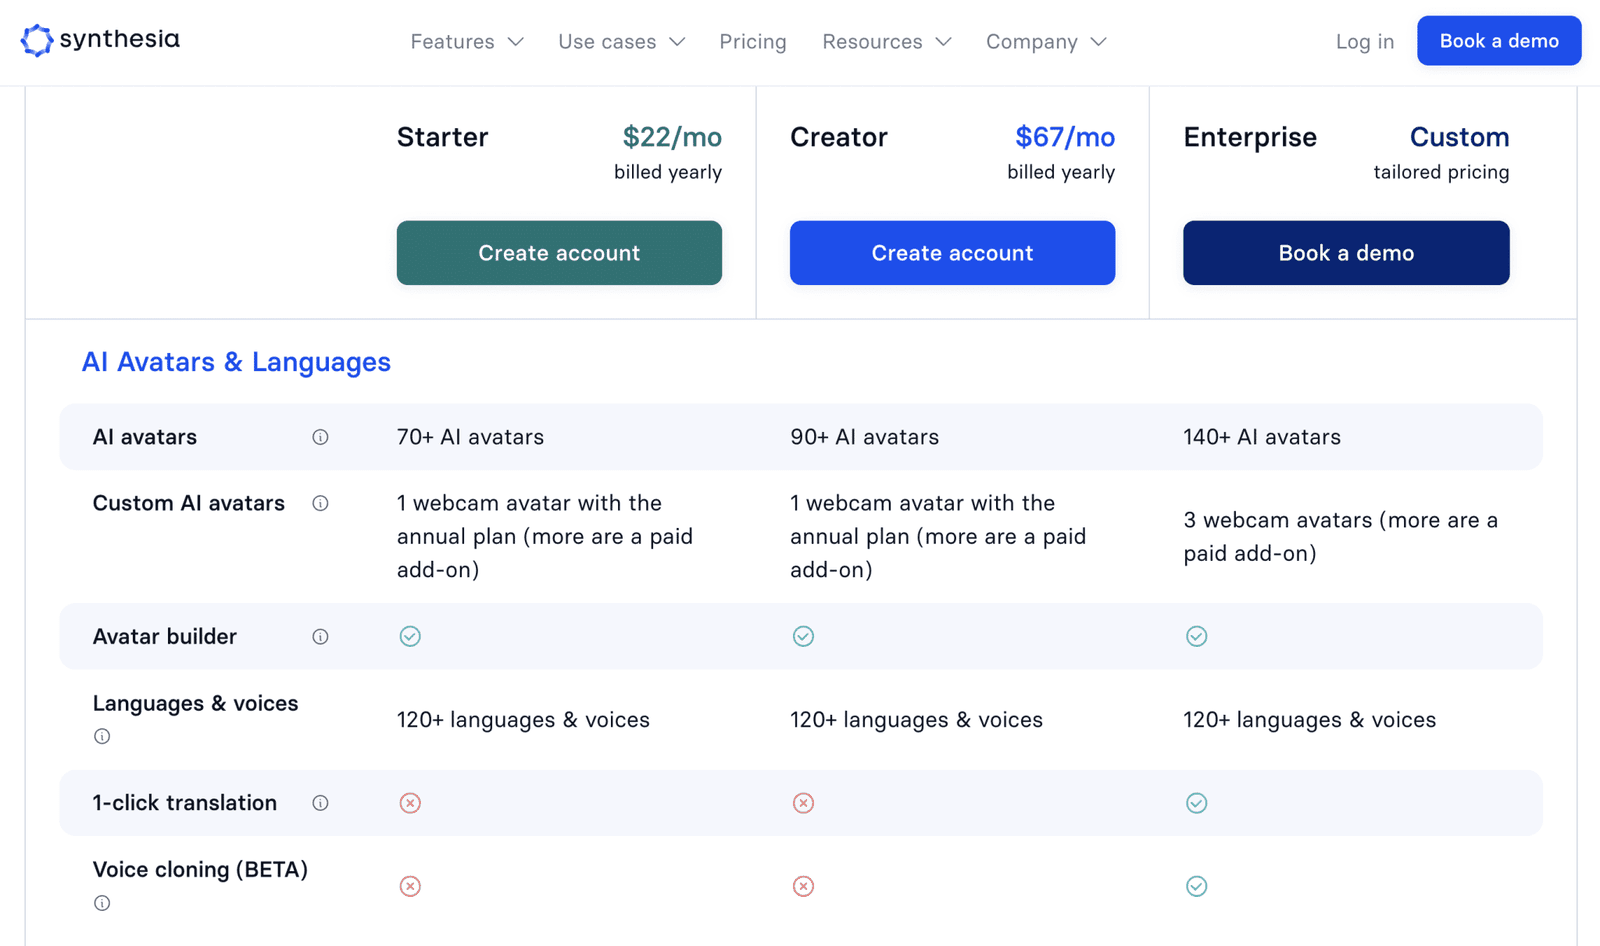
Costs of custom avatars
You can get 1 webcam avatar free with the annual plan (Starter and Creator), or 3 with the Enterprise plan. You can purchase additional webcam avatars if needed.
Each add-on is priced (ex-VAT) at:
- USD 240 / year
- EUR 216 / year
- GBP 192 / year
- INR 16,499 / year
Additional information can be found here.
How to create custom avatars with Synthesia
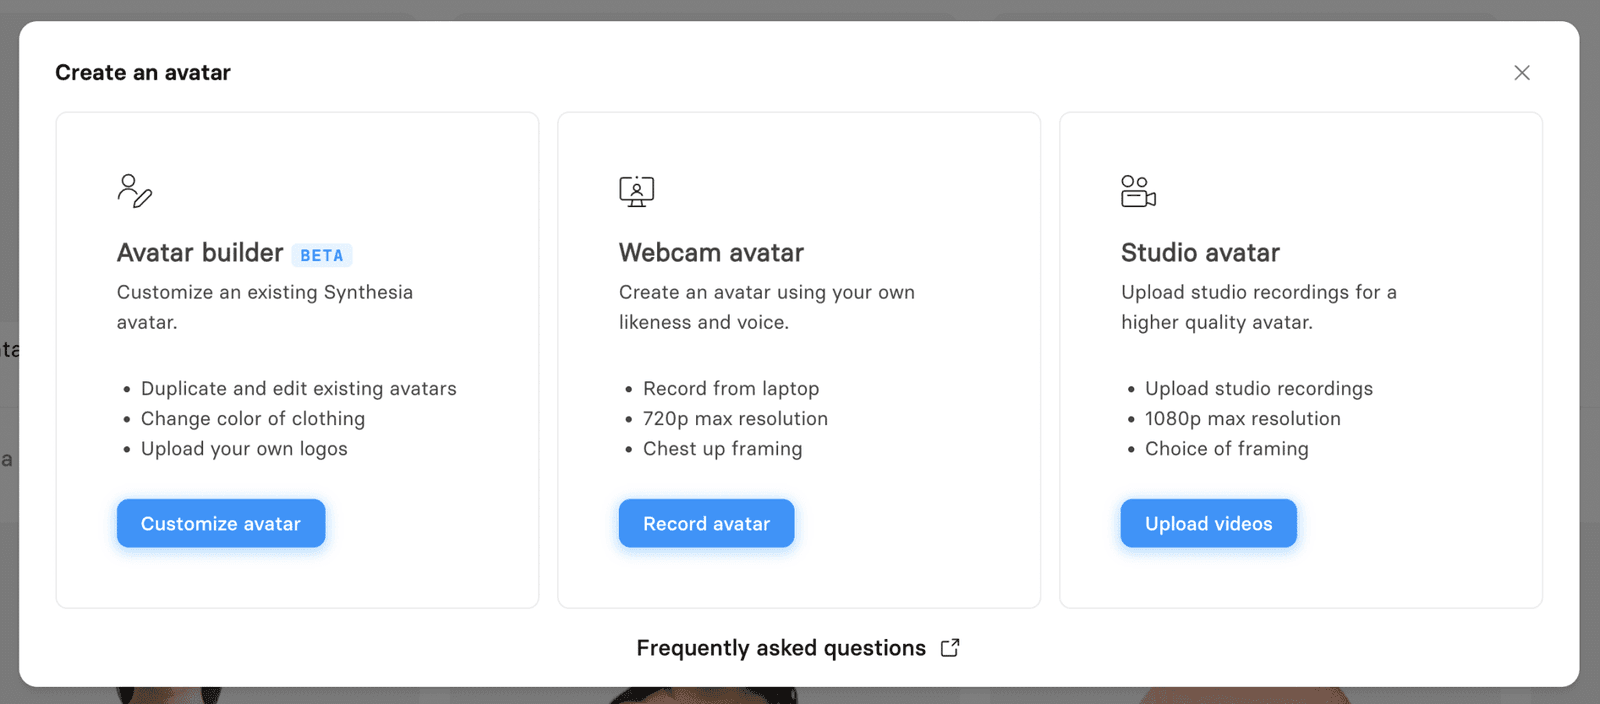
Option 1. Webcam avatar
After you choose “Webcam avatar”, you need to follow just a few very simple steps to complete the recording and submit them for processing.
Here are some specs related to the webcam avatar you should know:
- Record from laptop
- 720p max resolution
- Chest up framing
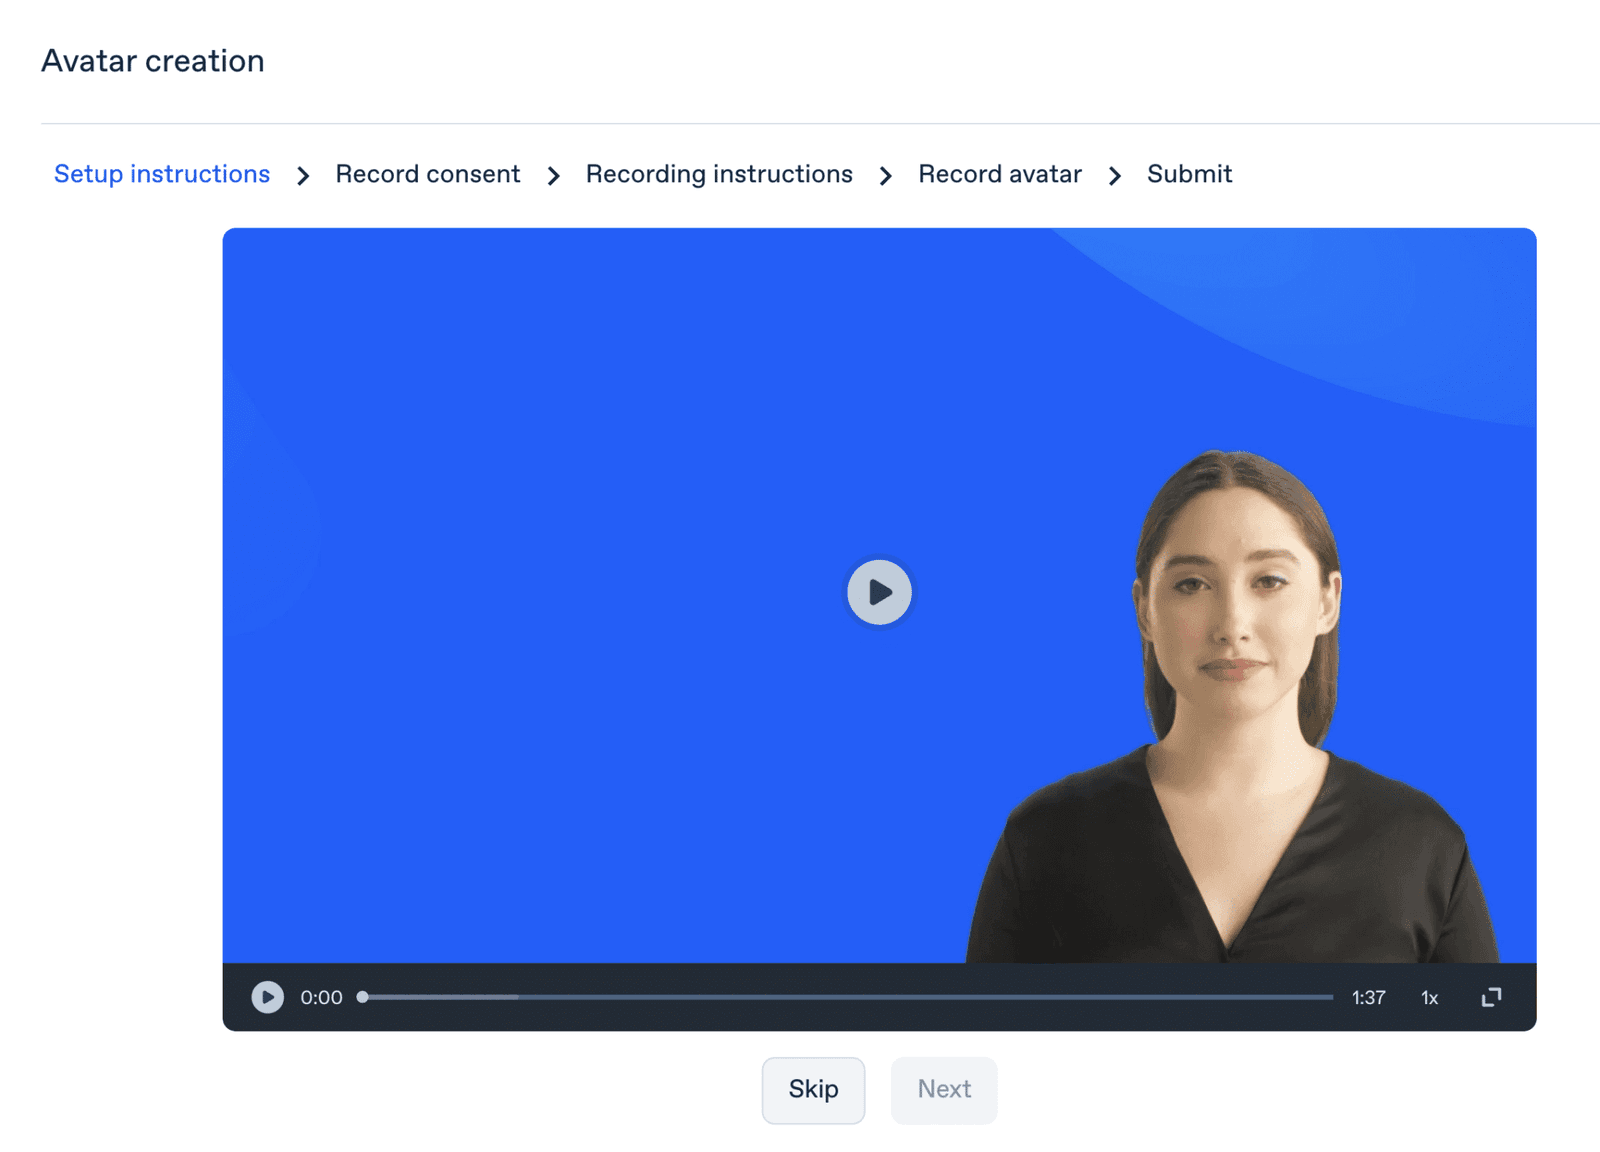
The instructions are very clear. I had no trouble following them and took only a few minutes (including the required 2-min webcam recording) to complete the recording.
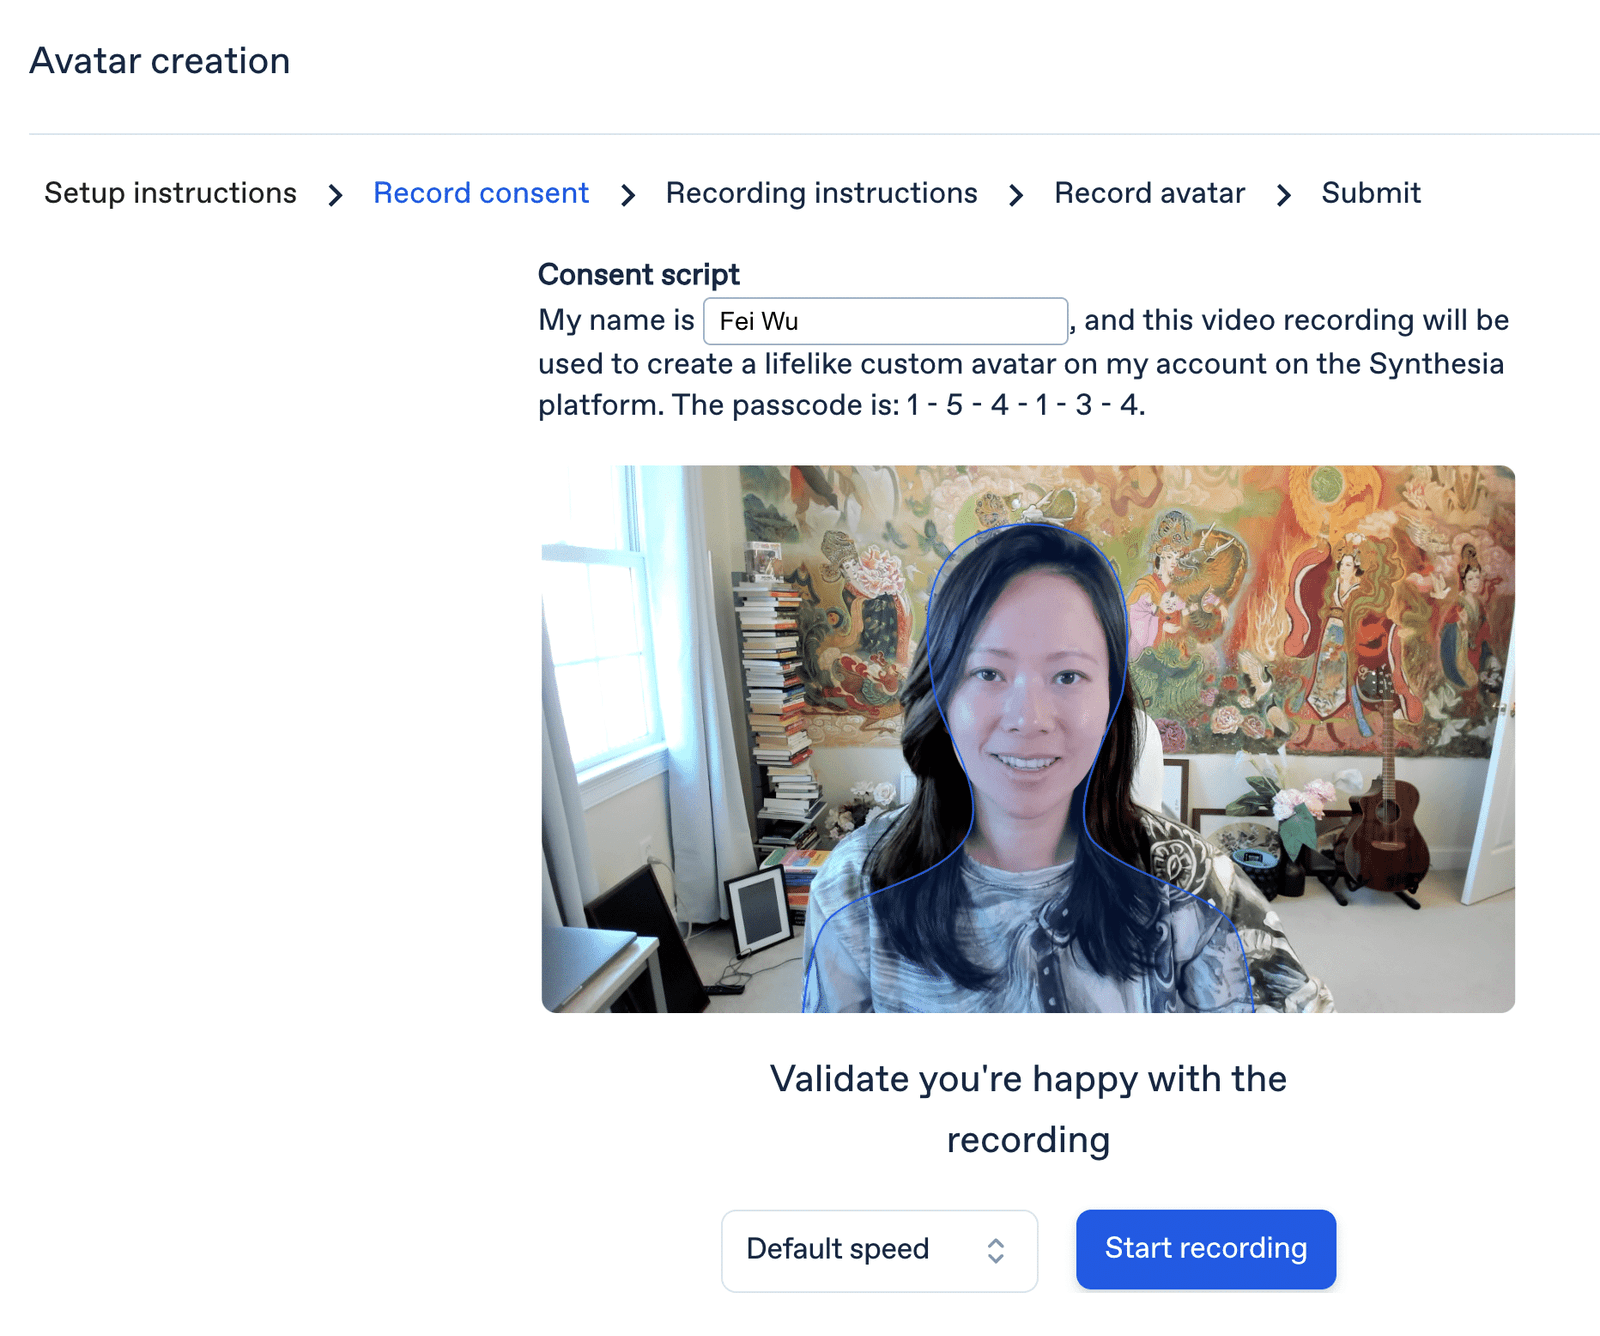
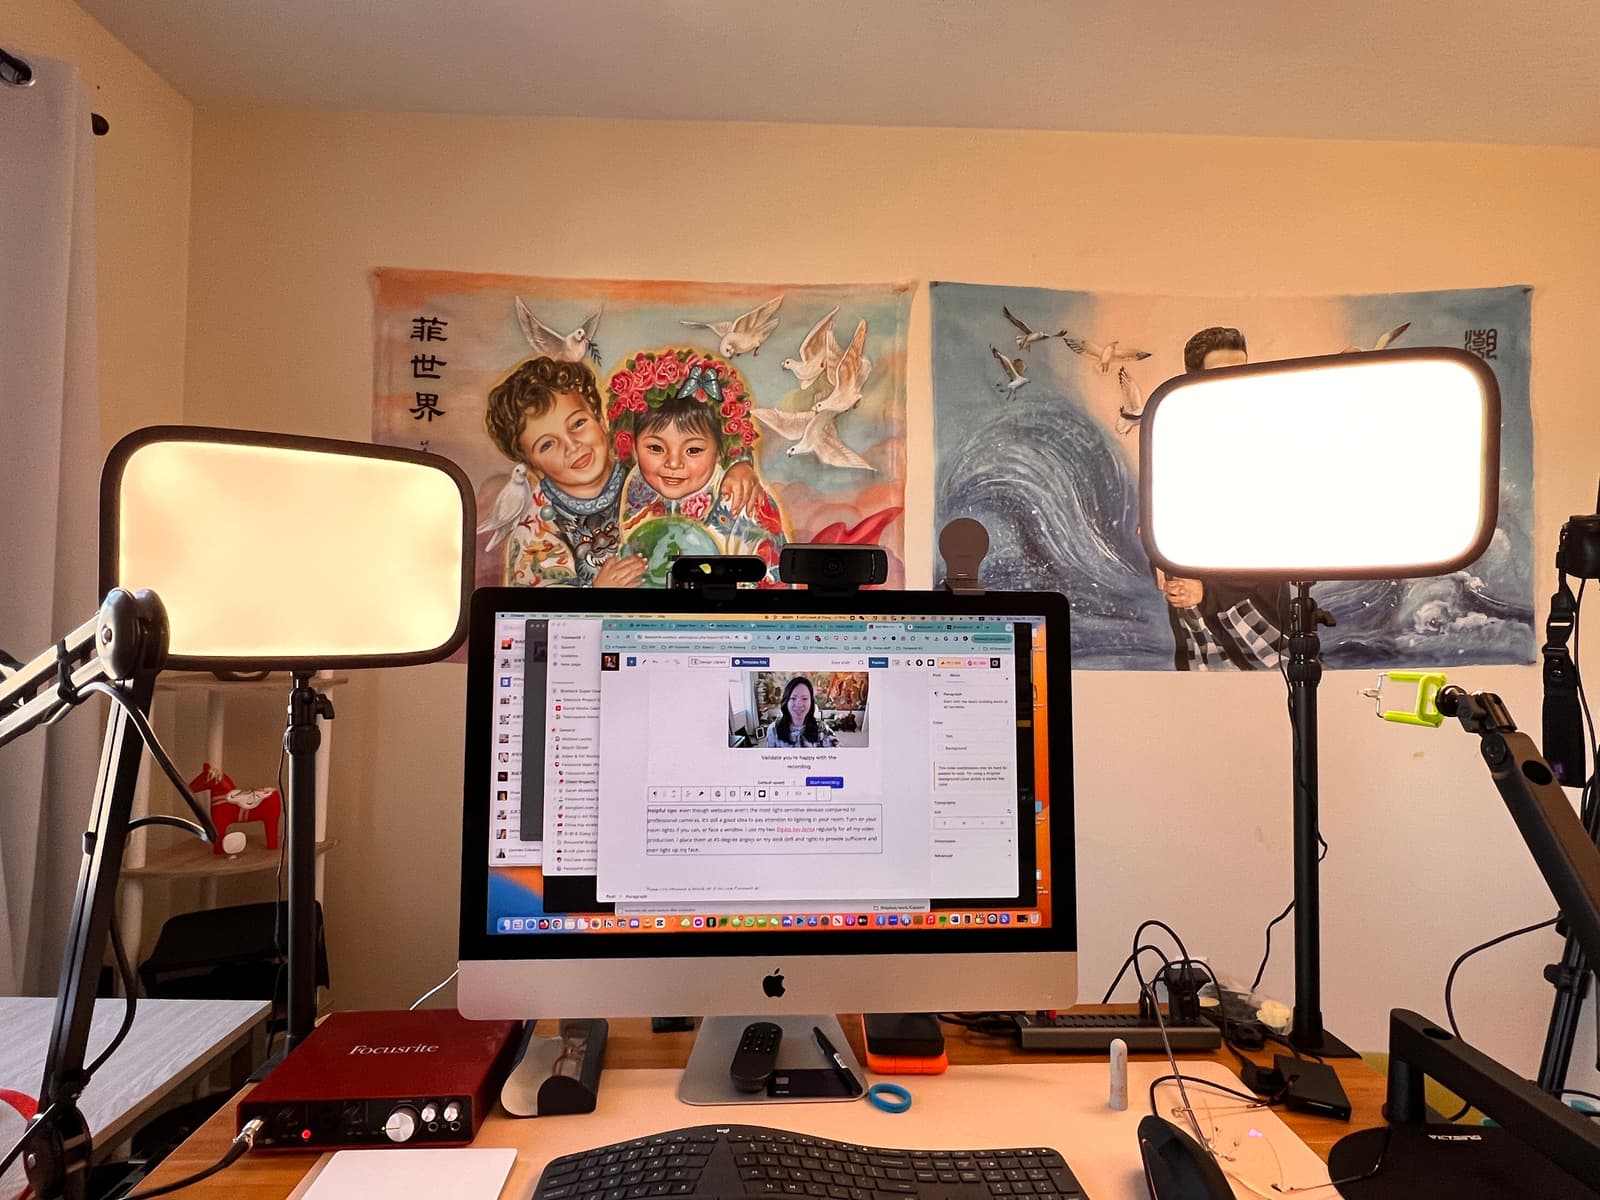
Helpful tips: even though webcams aren’t the most light-sensitive devices compared to professional cameras, it’s still a good idea to pay attention to lighting in your room. Turn on your room lights if you can, or face a window. I use my two Elgato key lights regularly for all my video production. I place them at 45-degree angles on my desk (left and right) to provide sufficient and even lighting to my face.
Another tip worth mentioning is the outfit and hairstyle. You should avoid outfits or hairstyles that don’t match your regular content. If a top looks too busy, it may not work as well for your future content. As of the writing of this article, you cannot customize or change your outfits after the avatar is created, so it’s best to choose a versatile top for this process.
After my webcam avatar was recorded, I received my custom avatar in less than a week. If you are looking for a shorter turnaround, a webcam avatar is the way to go.
Option 2. Studio avatar
After selecting “Studio Avatar”, here are the process to get started with your recording.
Here are some specs related to studio avatars you should know:
- Upload studio recordings (4K video quality is required)
- 1080p max resolution (as avatar output)
- Choice of framing (above chest, or above waist, or full body framing)
Step 1. Before you record
Creating your avatar requires three recordings of your actor speaking face camera for 2 – 3 minutes. If you work with a videographer or a studio, make sure to share with them the instructions.
- Instructions document
- Setup instructions video
- Performance instructions video
- Frequently asked questions
Step 2. Record your avatar
Provide 3 recordings of the script. Before uploading, make sure you follow the instructions, specifically:
- Recorded in Ultra-High Definition (4K) at 29.97 frames per second – be sure to update your settings on your camera. Otherwise, this step will need to be repeated.
- Recorded a video with good lighting and crisp image
- Recorded with no background noise and the actor clearly audible
- Didn’t use exaggerated head and body movements
- Looked directly at the camera at all times
- Avoided loose see-through hairstyles
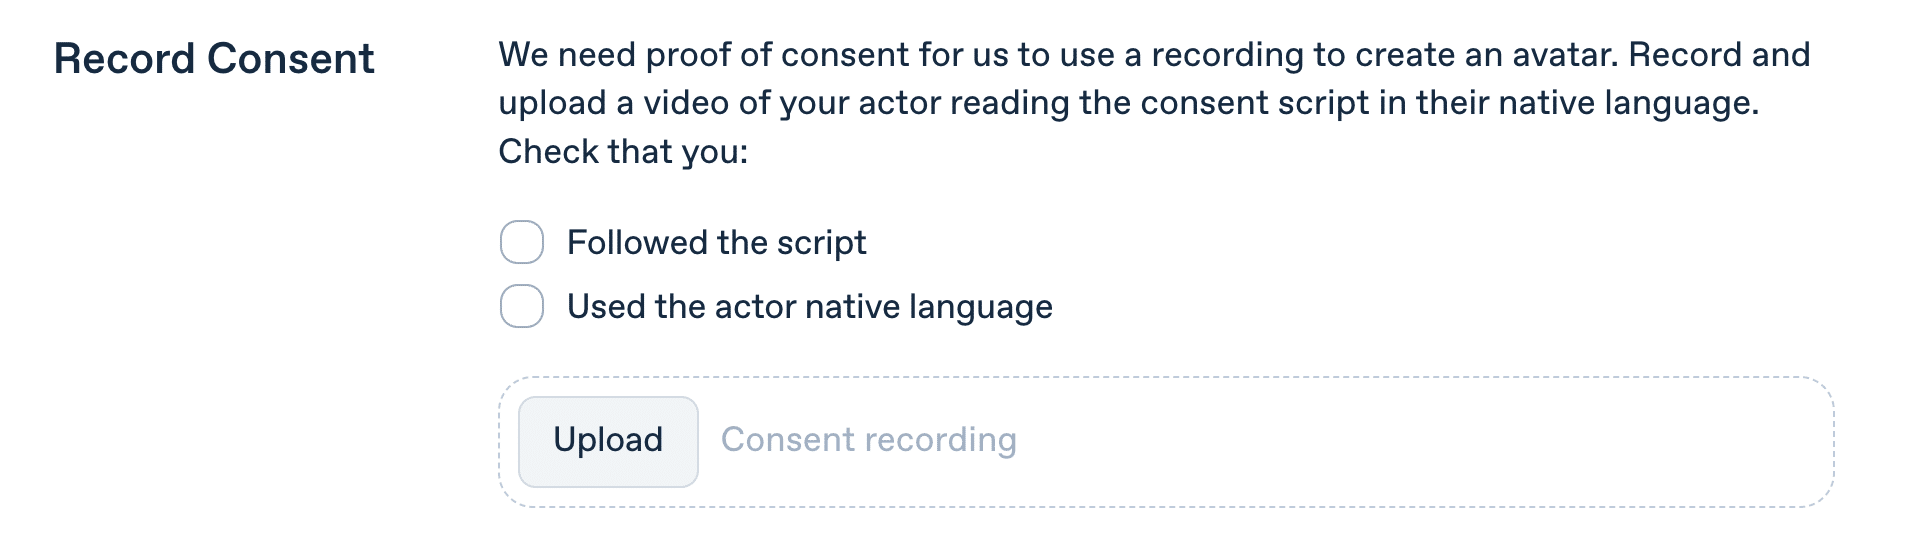
Step 3. After you have uploaded 3 takes of your recording, it’s time to record your consent.
Step 4. Give your custom avatar a name
Before you hit “Submit”, you need to give your avatar a name and select the framing type (chest up, or mid-torso up).
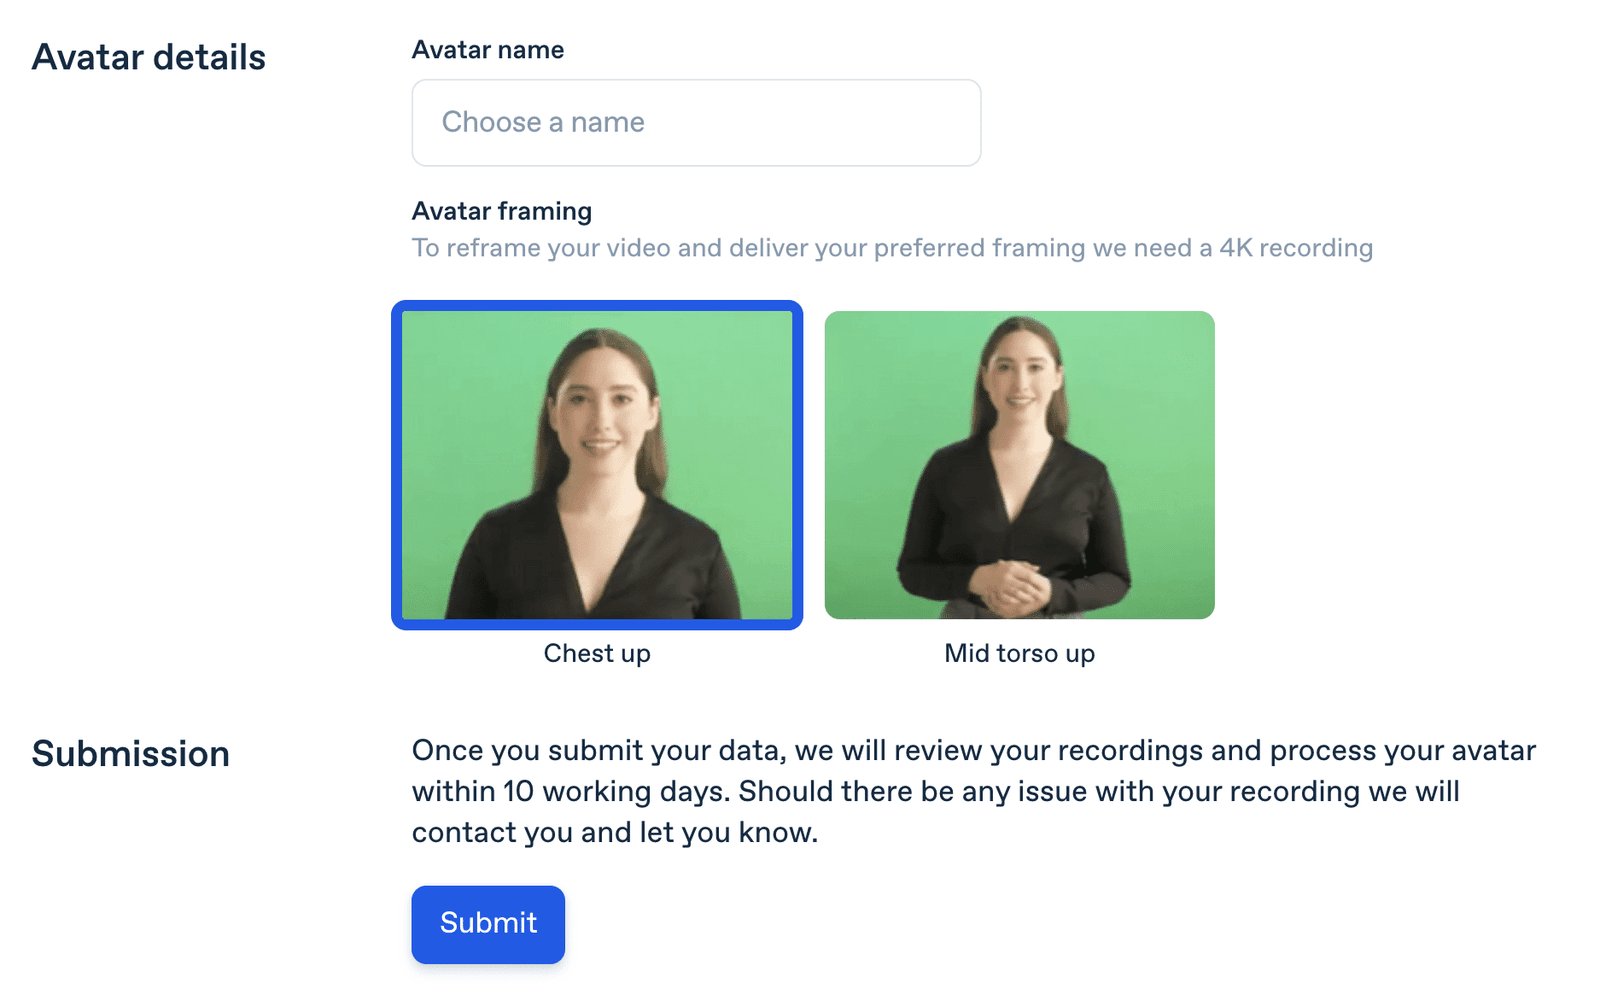
Once you submit your videos, it takes about 10 working days for Synthesia to send your studio avatars.
Helpful tips: once you have created a webcam avatar, it makes it easier to create the studio avatar as well. As for my setup, I used a Sony 6400 mirrorless camera to record my studio avatar. Because this camera was purchased years ago, I recommend you consider a wide lens and the Sony a7R if it’s within your budget. This way your camera can support a bigger range of production activities. My lighting kit is the same as my webcam avatar, for which I used Elgato key lights. Sound is important too even though I didn’t opt in to clone my voice (it’s optional for your custom avatar). But I made sure to plug in my Rode Mic so the engineers at Synthesia can hear me clearly, and I suppose that’ll be helpful for lip-synching and the general creation of my custom avatar. For microphones, I recommend the Rode wiresless go mics for the best sound quality.
One challenge I had while creating studio avatars was reading the prepared script, which is something I was never good at. Therefore I recommend some practice upfront before you hit the record button. To ease the process, I find leveraging a teleprompter such as this one from Elgato to work the best. It’s lightweight, easy to set up, and works seamlessly with any camera (thanks to the adapters provided).
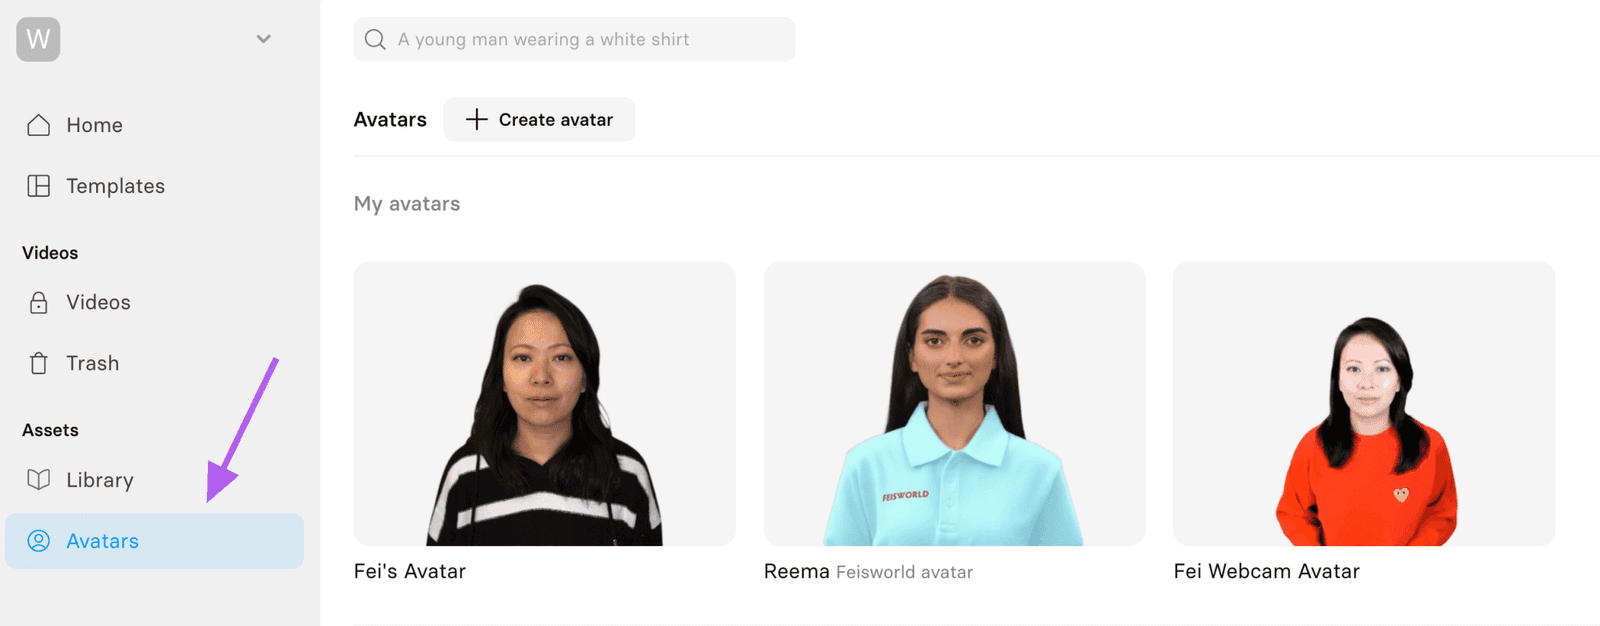
Where to find your custom avatars
Once your avatars are processed, you can find them inside your Synthesia account under “Avatars”. They will be placed above all the generic avatars and are ready to use right away.
What about voice cloning?
When purchasing a custom avatar from Synthesia, you have the option to clone your voice. This means your avatar will not only look like you but also sound like you. Please note that voice cloning is a separate process from creating your avatar’s footage and is only currently available for Corporate Plans.
Do you have to clone your voice for custom avatars? Not at all. It’s optional and entirely up to you. While I can see the appeal of an avatar that looks and sounds like you, some people may prefer to keep their voices anonymous especially if the videos are created for business and corporate use.
In addition, AI-generated voices from Synthesia allow you to dub your voice in over 120 languages. This can further ease the internationalization of your content. For that reason, I opted to not clone my voice so I can see my content in a variety of languages.
Conclusion: Is Synthesia’s custom avatars right for you and your business?
It’s worth experimenting, and ultimately it’s a plug for your creative work and your business. If a studio avatar is too much of a commitment right now, you should consider recording your webcam avatar first. Overall, the studio avatar is going to be of higher quality (1080p instead of 720p). With the different framing available through studio avatars, it makes them more versatile in the long run.
With that said, webcam avatars are so easy to create. I haven’t seen platforms (other than Synthesia) that provide this option. Therefore I recommend any creator and business owner to test out the webcam avatars.
You might also enjoy…

Written by
Fei WuFei Wu is the founder and CEO of Feisworld Media, a Massachusetts-based digital media company helping brands get discovered by people and by AI. An Adobe Global Ambassador and brand partner to ElevenLabs, Synthesia, and 50+ other tech and AI companies, she hosts the Feisworld Podcast (400+ episodes, 500K+ downloads — guests have included Seth Godin, Steve Wozniak, Chris Voss, and Arianna Huffington) and co-created the documentary Feisworld: Live Your Art on Amazon Prime. Fei writes for CNET, Lifehacker, and PCMag, and her work has been featured in Forbes, Harvard Business Review, and WIRED. She has been publishing on the internet since 2014 — long before AI discoverability had a name.
View all posts by Fei Wu→Stay updated
Weekly insights on content, AI, and digital media.
Keep Reading