How to Use Loom and Record Your Lessons for Remote and Online Learning (2023)

This step-by-step guide on how to use loom is created for entrepreneurs, speakers and educators who want to create online learning videos. These videos could be lessons, courses, masterclasses or alike.
Do you want to produce online videos with a very minimum setup without purchasing additional hardware and software, while still achieving high-quality results? — If this sounds like you, please keep on reading!
Loom makes it very possible for those who are new to the video production world and be able to do everything on their own without hiring a videographer or production team. COVID-19 makes purchasing hardware particularly difficult. This makes Loom as a minimal viable setup even more attractive. (Note: this isn’t a sponsored post by Loom – all opinions are my own)
Let’s go!
Loom works on a variety of operating systems, including:
- MacOS
- Windows
- Chrome (browser)
Download Loom for ay of the options above.
How to use Loom in 2023 (Top 7 Tips)
Tip 1. How to Choose Between Using Loom as a Desktop App, or a Mobile App?
How do you choose? It’s simple. You can try both and see which one you like better.
The Loom iOS app (if you have an iPhone or iPad) will work better for most of you. Should you try your mobile phone first? The answer – most likely – is YES. Your mobile phones will almost guarantee to deliver higher-quality videos.
The Loom mobile app on iOS has fairly basic features, but that may be all you need if you are recording:
- Sit-down or interview-style videos
- You want to share some basic screen elements from your phone (screen recording feature is available)
Your recordings will be backed up and available to share with others soon after you end your recording. This is a huge benefit for those who aren’t working in Google Drive or DropBox regularly. Loom comes with built-in storage for videos and it automatically uploads the videos for you.
>> Check out Loom’s guide on how to record with Loom Mobile
Where does the Loom mobile app fall short? If you are looking to produce somewhat sophisticated videos such that you need to switch between camera-only, vs. screen and camera, vs. screen-only, or you prefer recording from your favorite microphone attached to your computer, then the mobile app may not be your best bet. In which case, consider using the desktop app instead.
The Loom desktop app comes with a few more features including enhancements and editing the videos. If you are someone who’s more comfortable working on a desktop or laptop, try the desktop app. Another important determining factor is whether you have a decent webcam. In most cases, desktop built-in webcams are limited in its ability to deliver high-quality videos.
“MacBook Air, MacBook Pro, even the iMac, all have that 720p webcam. … It’s the $5,000-and-up iMac Pro, which has Apple’s on computer-based 1080p FaceTime HD camera.” – according to CNET. In other words, most built-in webcams for Mac – and often for PCs – are just ok, your mobile phones have the better cameras.
This is when an external webcam such as the Logitech HD 1080p webcam becomes super popular. However, since the start of the pandemic, people find it nearly impossible to track down one of these webcams.
Pro Tip BEFORE you record a ton of videos. You should always record a sample with your setup, send it to a friend (who knows a bit about video production), or to the team if you are working with one just to make sure your delivery is sufficient.
Tip 2. How to Stabilize and Place Your Mobile Device When Recording (With an iPhone or IPAD)
You can leave your phone on a pile of books, or a much better way to manage your phone is to use a tripod. The basic Amazon tripods only cost about $20, whereas a much more professional one could cost $70 or more. Below is a list of options for you to choose from:
- Mactrem professional camera tripod with ball-head: https://amzn.to/2WOIdRF
- AmazonBasic lightweight tripod (60-inch): https://amzn.to/2vNzhRk or (50-inch) https://amzn.to/3brh4s1
- Manfrotto travel tripod: https://amzn.to/2zJ3ejA
- Bendable tripod such as: https://amzn.to/39dt8LJ or https://amzn.to/33HtAAS


Tip 3. Video Orientation – Landscape or Portrait?
Before you hit the record button, it’s really important to remember the orientation of the video. In most cases, you want to shoot in landscape (and not portrait). If you are recording a video for educational purposes, landscape is most accessible – think traditional teaching platforms – online courses, YouTube, your TV at home!
The exceptions are with some social media platforms where we’ve seen square (Instagram) and portrait videos (Pinterest, TikTok, etc.).
If you are an educator, speaker and entrepreneur, your audience will most likely want to consume content in landscape. Hence it’s be best to shoot with landscape then repurpose for social media later on.

Tip 4. Video Framing – How to Look Best on Camera
Example #1
Closer to the Camera. Head Position Is Near Center on the Screen (Slightly Closer to the Top of the Frame). Best for Talking Head Type Videos
Here’s screenshot of your truly on YouTube, where I record a lot of sit-down, conversational videos and tutorials. As you can see I’m quite close to the camera, by design.
I want to get closer to my audience (though I’m nowhere near them physically). In my videos, I tend not to bring a lot of products to showcase, so I don’t need a ton of room on either side of me. [If interested, check out the actual video here]

Example #2
Slightly Bigger Background for Product Showcase, or Other Elements You Might Want to Bring Into the Video in Post-production
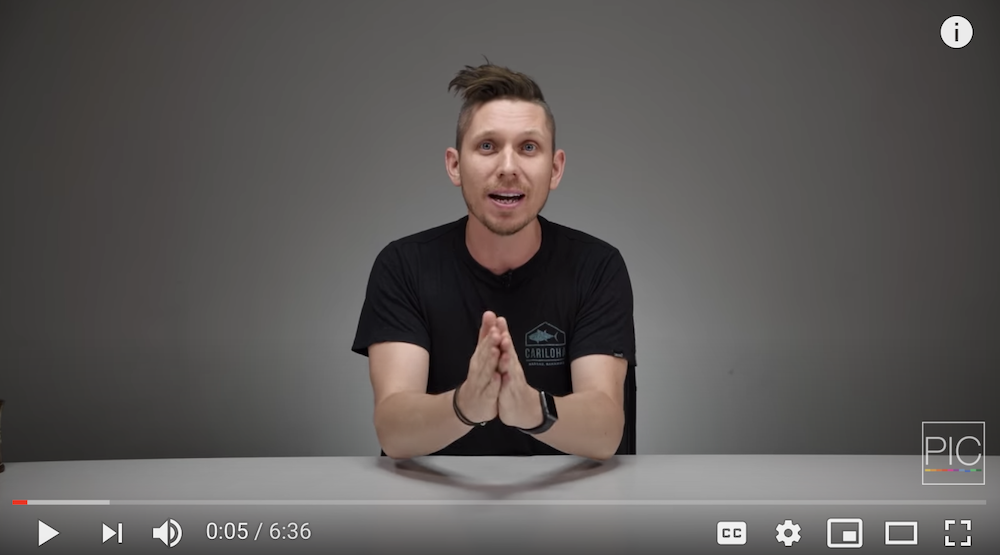
My friend Ed Gregory is a professional photographer and videographer (ignore his epic setup, focus on the framing of his video). Ed has a bigger background and a table where he rests his arms. He does a lot of product reviews, where the table comes in handy.
If your videos are focused on showcasing other products and designs, this setup might work better for you. However, if you are using your phone to shoot the video, make sure to not stay too far away as the quality of your video may degrade due to lighting and sound recording capabilities with just a mobile phone. If you are using your webcam, well, I guess you won’t be able to stay too far away. 🙂
Watch the actual video if interested.
Tip 5. Lighting Is Really Important, but It Doesn’t Have to Be Expensive
- Nature light is free! You can record at home while facing the window, or you can go outside. The benefit of recording at home is that you don’t have to worry about street noises, and the general environment at home is more “controlled”.
- Use a lamp or turn on your lights at home. While natural light is quite wonderful, it’s also harder to control and it limits the amount of time you have available to record. Also, if you are like me who works from a room without a lot of natural light, you then need a secondary light source. Most home lights will work fine, but I would not recommend light sources directly above your head. This type of light will create shadows on your face.
- Purchase studio lights or a ring light – these options listed below are perfect for home studios. They don’t cost a fortune and will last for a long time.
- Neewer ring light kit: https://amzn.to/2QrtVSP
- Neewer two-pack standing light kit: https://amzn.to/2IT86H

The 3-Point Light Setup
The purpose of 3–point lighting—which is used in traditional photography, cinematography, and 3D visualizations—is to properly illuminate a subject in an effective and pleasing way by simply using three separate lights.
Here’s how you cheat without so many light sources available:
If you use a ring light, leave it directly in front of you (where the camera is, or slightly behind the camera). If you use a two-pack standing light, have them placed 45 degree on each side of you (see image below). The backlight? It’s nice to have that but it’s optional for most home videos.

In this short video below, I walk you through some of the lighting options you can consider. This tutorial isn’t only designed for using Zoom, but for anyone who hope to produce high-quality videos and look their best on camera. There are also some sneak peaks into the webcams, microphone as well if they interest you.
Tip 6. Still Want Better Sound? Here Are the Microphone Options That Won’t Break the Bank
External microphones for your computer desktop and laptop:
- The Blue Yeti USB Microphone
- Audio-Technica ATR2100-USB Cardioid Dynamic USB/XLR Microphone (I like this mic better than Yeti)
External microphones for your mobile phones including iPhones and iPads
- Rode mic (compact): https://amzn.to/2O62BaK
- PoP Voice Lavalier Lapel Mic: https://amzn.to/3cQ6ElZ
- Professional Grade Lavalier Lapel Mic: https://amzn.to/2MMOiYt
Tip 7. Sharing Your Video From Loom
Loom makes it so easy to share your videos, check out this guide and share your videos with just a few clicks.
Wrap-up: How to use Loom
If I missed anything, or you have suggestions to better the experience, please leave a comment below.
Creatively yours,
Fei
You might also enjoy…
- Loom: the #1 screen recording app to 10x your productivity and eliminate meetings
- 7 reasons I moved all my online courses to Podia
Ready to start and grow your own YouTube channel?

Written by
Fei WuFei Wu is the founder and CEO of Feisworld Media, a Massachusetts-based digital media company helping brands get discovered by people and by AI. An Adobe Global Ambassador and brand partner to ElevenLabs, Synthesia, and 50+ other tech and AI companies, she hosts the Feisworld Podcast (400+ episodes, 500K+ downloads — guests have included Seth Godin, Steve Wozniak, Chris Voss, and Arianna Huffington) and co-created the documentary Feisworld: Live Your Art on Amazon Prime. Fei writes for CNET, Lifehacker, and PCMag, and her work has been featured in Forbes, Harvard Business Review, and WIRED. She has been publishing on the internet since 2014 — long before AI discoverability had a name.
View all posts by Fei Wu→Stay updated
Weekly insights on content, AI, and digital media.
Keep Reading
Related Articles

Ecamm Review 2026: Dual Mode Changed How I Create Video (Here’s How)

The Ultimate Guide to Adobe Firefly Video Generation: Choosing the Right Model for Your Project (2026)
